If you run a service business, teach classes, or organize events, you’ve probably wished your WordPress site could handle bookings on its own, without forwarding people to a third-party scheduling tool or dealing with back-and-forth emails.
Good news: you can set up a fully working booking system on WordPress for free, without writing a single line of code. This guide walks you through the entire process. From installing a plugin to accepting your first booking with online payments.
What You Need Before Starting
- A WordPress site (self-hosted, version 5.8 or higher)
- Admin access to your WordPress dashboard
- A Stripe account if you want to accept payments (optional. Free events work without it)
That’s it. No special hosting, no PHP extensions, no developer required.
Step 1: Install a Booking Plugin
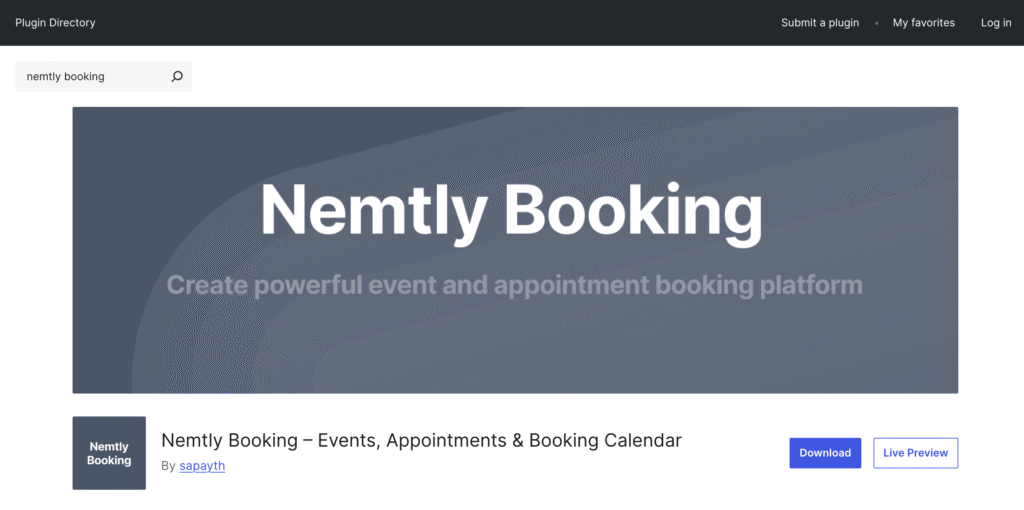
WordPress doesn’t include booking functionality out of the box, so you need a plugin. In this guide we’ll use Nemtly Booking, a free plugin that handles events, appointments, and payments in one package.
- In your WordPress admin, go to Plugins → Add New
- Search for “Nemtly Booking”
- Click Install Now, then Activate
After activation, you’ll see a new Nemtly Booking menu item in your admin sidebar.
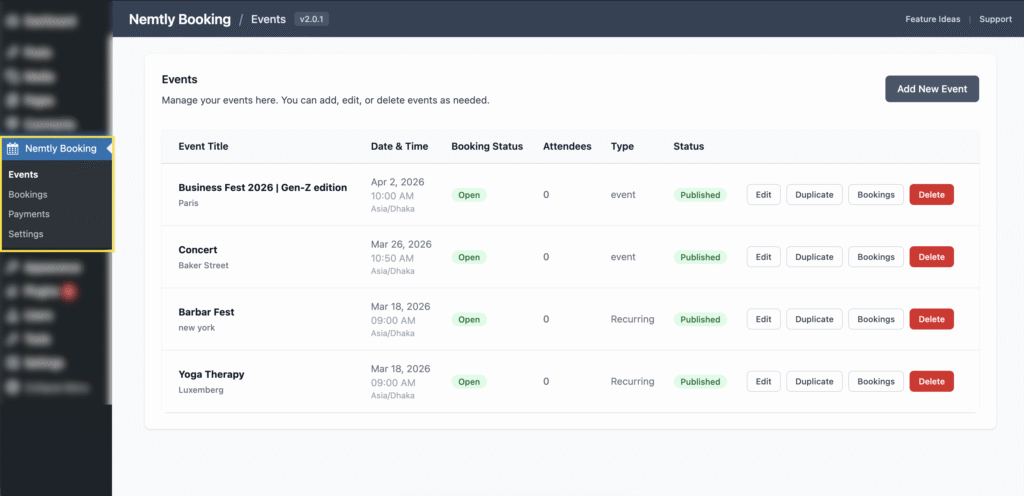
Step 2: Create Your First Event
Now for the main event (pun intended). Click Nemtly Booking → Events in your admin menu, then click Add New Event.
The event creation form has four steps:
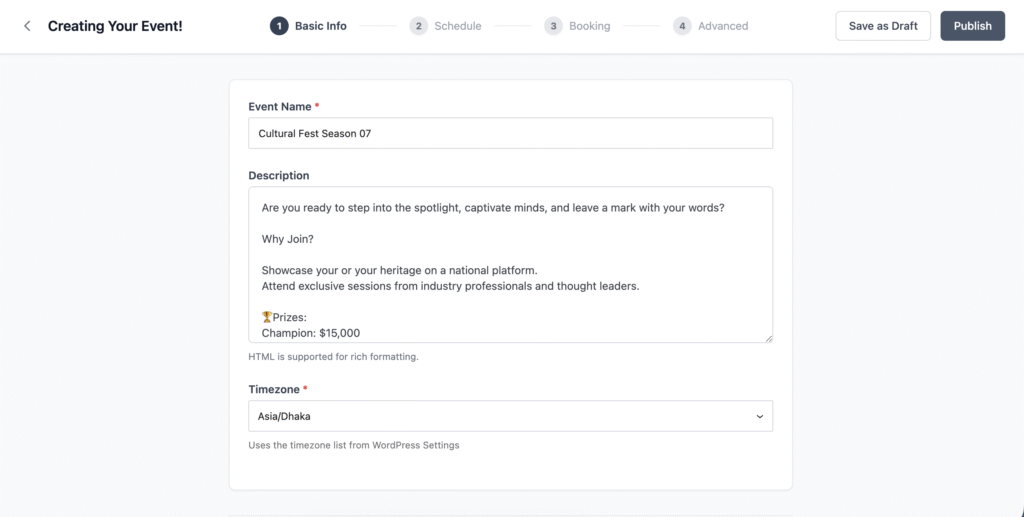
Basic Info
Enter a title for your event or service. For example:
- “30-Minute Career Consultation”
- “Saturday Morning Yoga Class”
- “Annual Marketing Conference”
Add a description explaining what attendees can expect. This appears on the event page your customers will see.
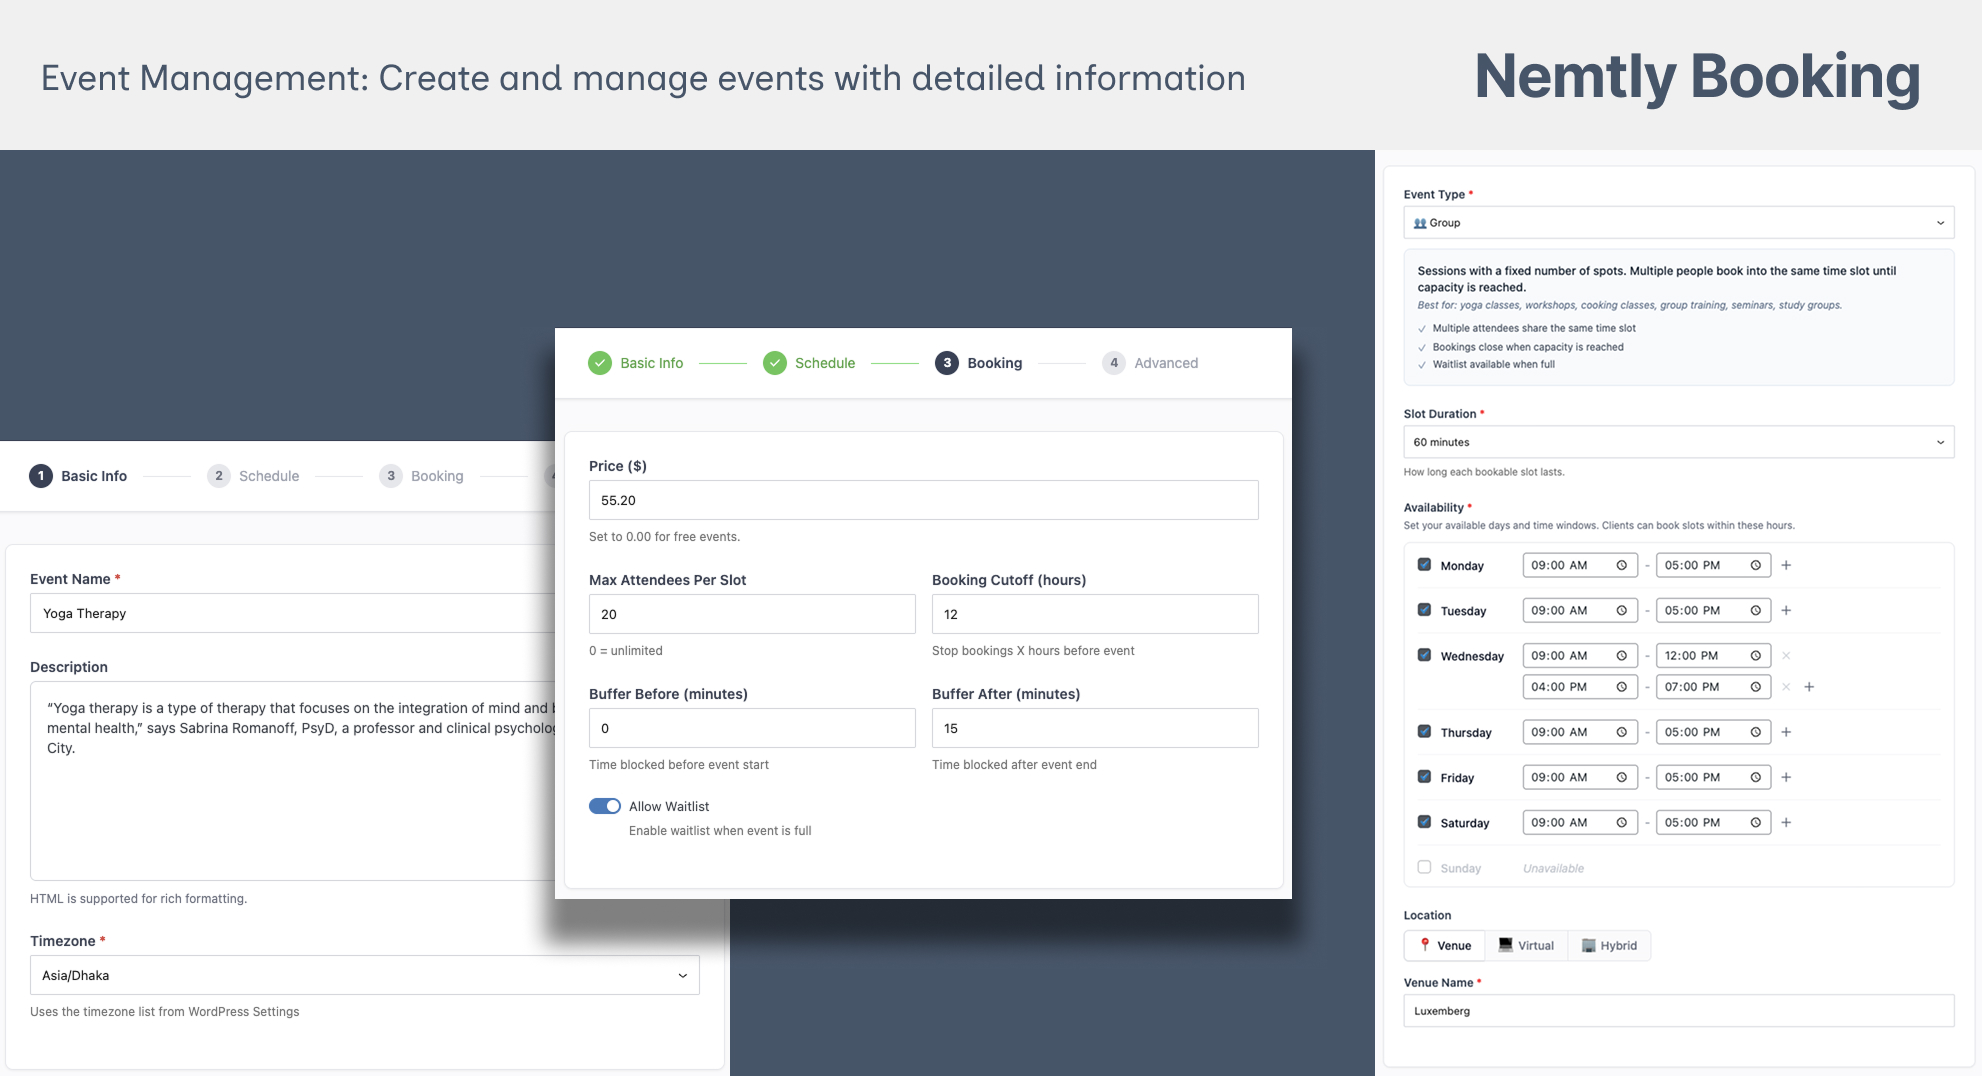
Schedule
This is where it gets interesting. First, pick your event type:
- One-on-One — Private appointments with one attendee per slot. Best for consultations, tutoring, therapy sessions. The plugin creates individual time slots (e.g., every 30 minutes between 9 AM and 5 PM).
- Group — Classes or workshops where multiple people attend the same slot. You set the capacity (up to 20 by default). Best for yoga classes, cooking workshops, group coaching.
- Event — A single gathering on a specific date. Attendees pick the date, not a time slot. Best for conferences, meetups, webinars.
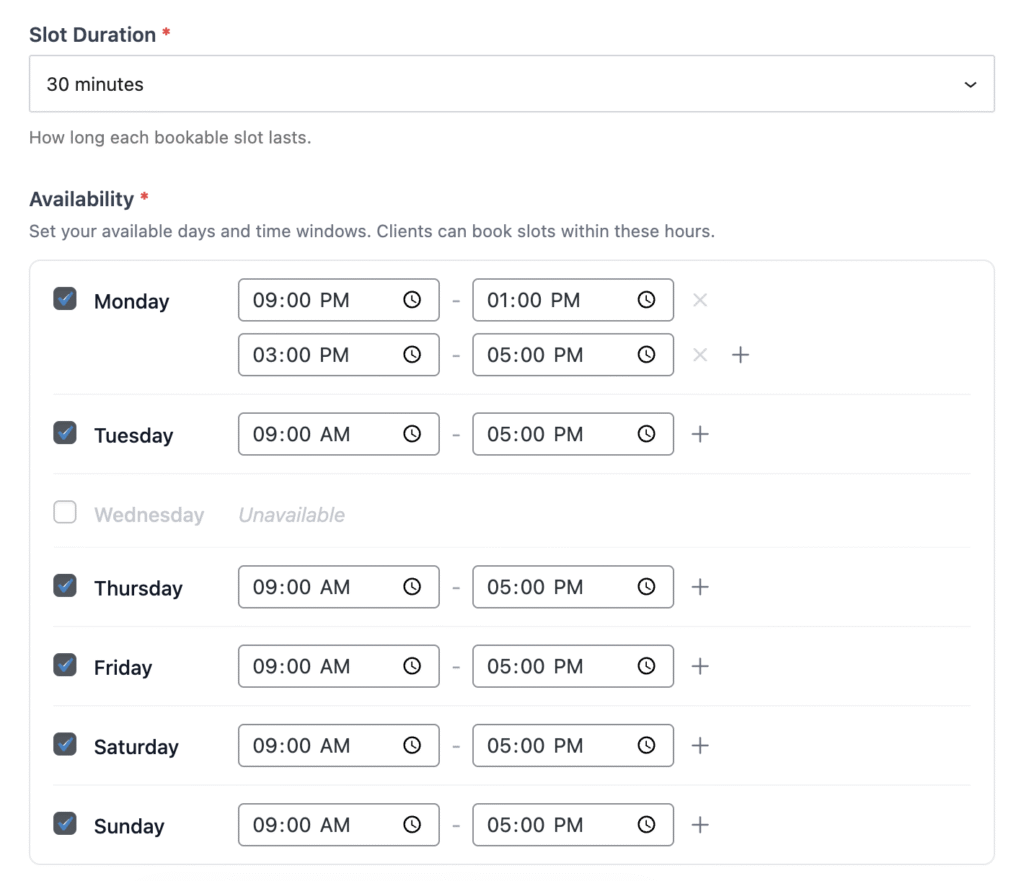
For slot-based types (one-on-one and group), you’ll set your availability — which days of the week and what hours you’re available. The plugin generates bookable time slots automatically based on the duration you set.
For example, if you offer 30-minute consultations and mark Tuesday and Thursday as available from 9 AM to 5 PM, the plugin creates sixteen 30-minute slots across those two days.
You can also set:
- Location — A physical address or a virtual meeting URL
- Buffer time — Padding before or after each appointment to prevent back-to-back scheduling
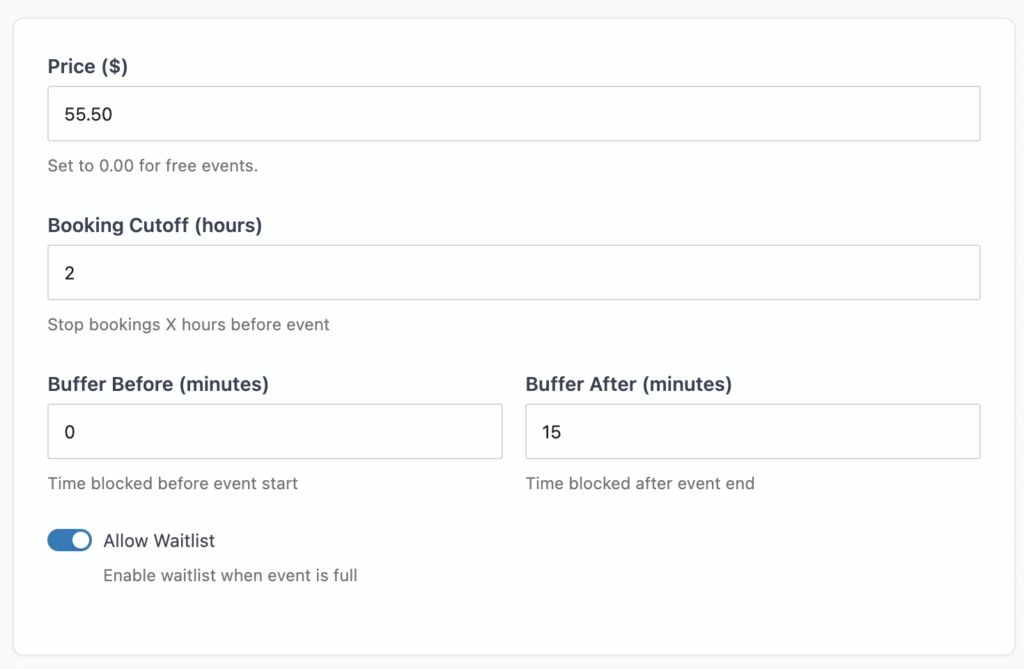
Booking & Pricing
Set the price for your event. Enter 0 or leave it blank for free events — the payment step will be skipped entirely for your customers.
Configure:
- Max attendees — How many people can book each slot (or the entire event)
- Booking cutoff — How far in advance someone must book (e.g., 2 hours before for one-on-one, 48 hours for events)
- Waitlist — Allow people to join a waitlist when slots fill up (available for group and event types)
Advanced
Optionally add a featured image that shows on event listings and the calendar.
Click Publish when you’re ready, or Save as Draft to finish later.
Step 3: Display Events on Your Site
Your events need to appear somewhere your visitors can find them. Nemtly Booking gives you two ways to do this: Gutenberg blocks and shortcodes.
Option A: Gutenberg Blocks (Block Editor)
Open any page in the block editor and add one of these blocks:
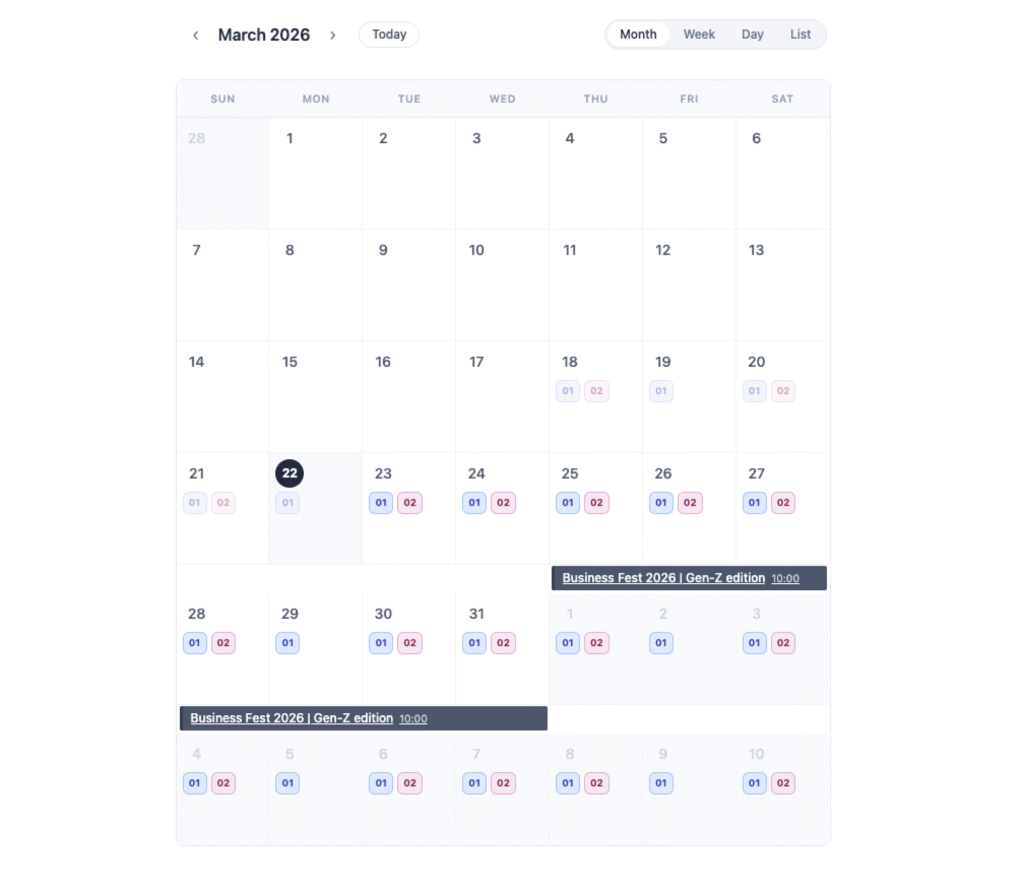
Event Calendar — Displays an interactive calendar where visitors can browse events by month, week, day, or list view. Visitors click an event to see details and book.
Nemtly Events — A list/grid of your upcoming events with filters, search, and pagination. This is actually a variation of the core WordPress Query Loop block, so it works anywhere the block editor is available.
Option B: Shortcodes (Classic Editor or Page Builders)
If you use a classic editor or a page builder like Elementor, use shortcodes instead:
[nemtly_calendar]— The interactive event calendar[nemtly_event_list]— A searchable, filterable event grid with pagination
Just paste the shortcode into any page or post. Shortcodes work inside Elementor, Beaver Builder, Divi, and any other builder that supports them.
Both options display your events with real-time availability. When a visitor clicks an event, they see available dates and times and can book directly.
Step 4: Set Up Payments (Optional)
If you’re charging for your events, connect Stripe so customers can pay during the booking process.
- Go to Nemtly Booking → Settings → Payments
- Enable Stripe as a payment method
- Enter your Stripe Publishable Key and Secret Key (find these in your Stripe Dashboard under Developers → API Keys)
- Enter your Webhook Secret (create a webhook endpoint in Stripe pointing to the URL shown in your settings)
- Save changes
Nemtly uses Stripe’s Payment Element, which means your customers can pay with credit cards, Apple Pay, Google Pay, and other methods you’ve enabled in your Stripe account — all from a single checkout interface.
For offline payments (cash, bank transfer, check), you can also enable manual payment recording and provide instructions that appear during checkout.
Don’t need payments? Skip this step entirely. Free events work without any payment gateway.
Step 5: Test the Booking Flow
Before going live, test the experience your customers will have:
- Visit the page where you added your calendar or event list
- Click on an event
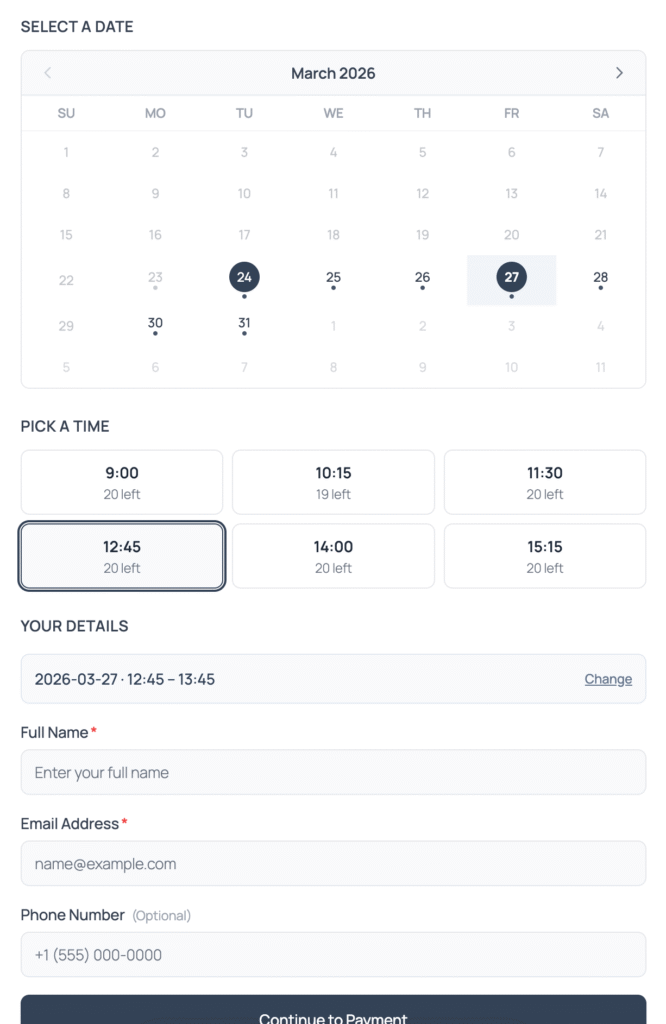
- Pick an available date and time slot (for slot-based events)
- Fill in the booking form — name, email, and optionally phone number
- Complete payment (if it’s a paid event) or click “Confirm Booking” (if it’s free)
- Check your email for the booking confirmation
In your admin panel under Nemtly Booking → Bookings, you’ll see the new booking with its status.
What Your Customers Experience
Here’s the full booking flow from your customer’s perspective:
- Browse — They visit your page and see your events in a calendar or list
- Select — They click an event and pick a date and time
- Book — They fill in their name and email
- Pay — They complete payment through Stripe (or see manual payment instructions, or skip payment for free events)
- Confirm — They receive a confirmation email immediately
- Remind — They get an automated reminder email before the event (if you’ve enabled reminders in settings)
- Manage — They can view their bookings anytime through a customer dashboard (more on that below)
No account creation required. No passwords to remember.
Bonus: Set Up a Customer Dashboard
Give your customers a place to view their booking history:
- Create a new page in WordPress (e.g., “My Bookings”)
- Add the shortcode
[nemtly_booking_dashboard] - Publish the page
When customers visit this page, they enter their email address and receive a magic link — a one-time login link sent to their inbox. Clicking it logs them in for 24 hours without needing a password or WordPress account. They can see all their past and upcoming bookings.
Bonus: Sync with Google Calendar
If you manage your schedule in Google Calendar, Nemtly Booking can sync events both ways:
- Go to Nemtly Booking → Settings and connect your Google account via OAuth2
- Once connected, confirmed bookings automatically appear in your Google Calendar
- If a booking is cancelled, the Google Calendar event is removed automatically
Set it up once and it runs in the background.
Bonus: Email Reminders
Reduce no-shows by sending automated reminder emails:
- Go to Nemtly Booking → Settings → Emails
- Enable Automated Reminders
- Set how many hours before the event the reminder should be sent (default: 24 hours)
- Customize the reminder subject and message
Reminders go out automatically via WordPress cron — no manual work needed.
Summary
Here’s what you’ve built — in about 15 minutes and zero code:
- A booking system with real-time availability
- An event calendar or event list on your website
- Online payments via Stripe (or free events without payment)
- Automated confirmation and reminder emails
- A customer dashboard with magic link login
- Google Calendar sync
All of this is free. Nemtly Booking is available on WordPress.org with no premium tier required for the features covered in this guide.
Ready to get started? Install Nemtly Booking from WordPress.org and create your first event in minutes.
Leave a Reply