Your WordPress site can list pages and posts just fine, but when it comes to showing events on a calendar, with dates, times, and the ability to book, you need something more. A visual event calendar lets visitors browse what’s coming up, see availability at a glance, and take action without leaving your site.
This guide shows you how to add an interactive event calendar to any WordPress page in a few minutes, using a free plugin. No coding, no theme changes.
What You’ll End Up With
An interactive calendar on your site that:
- Shows events in month, week, day, or list views
- Lets visitors switch between views
- Displays multi-day events spanning across calendar cells
- Links each event to its own page for details and booking
- Works on mobile and desktop
- Updates automatically when you add or edit events
Step 1: Install Nemtly Booking
If you haven’t already:
- Go to Plugins → Add New in your WordPress admin
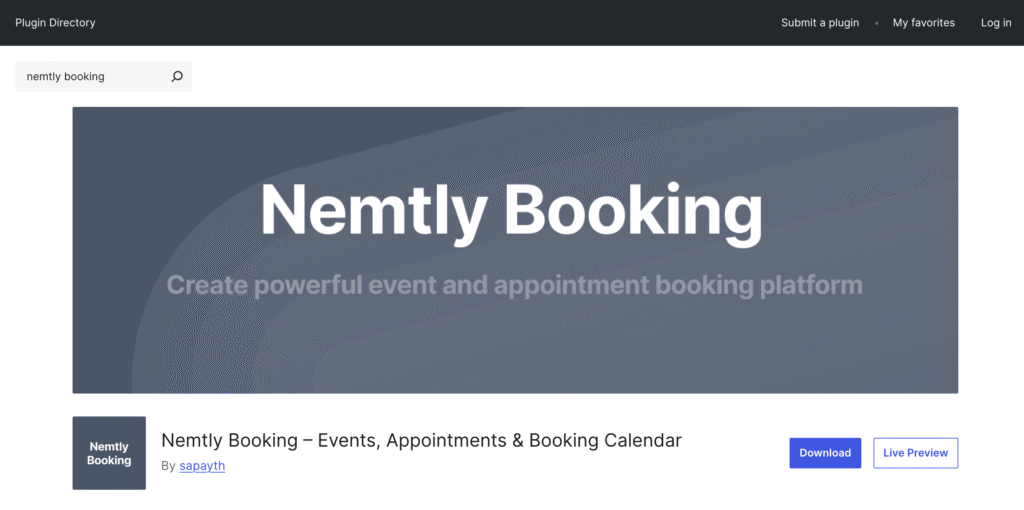
- Search for “Nemtly Booking”
- Click Install Now, then Activate
The plugin handles both event management and calendar display, so you don’t need separate plugins for each.
Step 2: Create a Few Events
A calendar isn’t much to look at without events on it. If you already have events, skip ahead to Step 3.
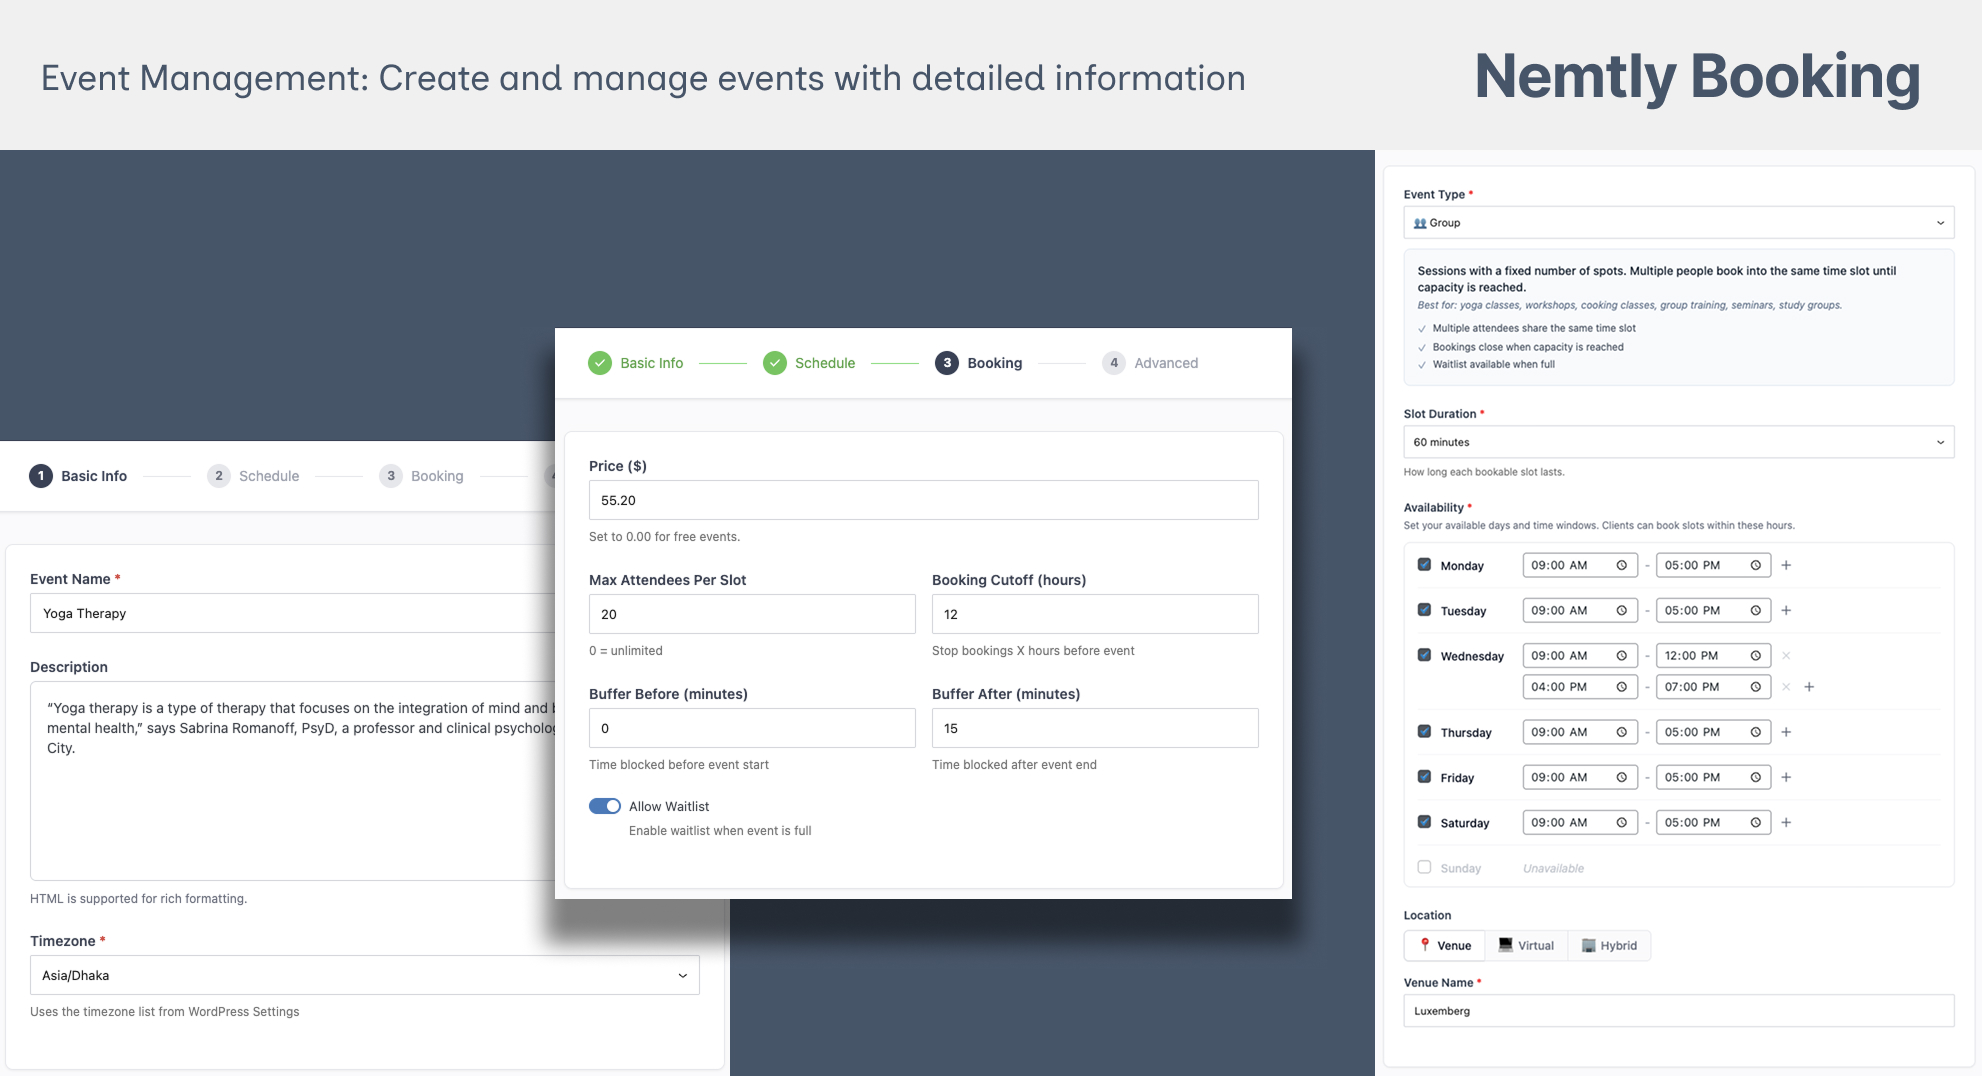
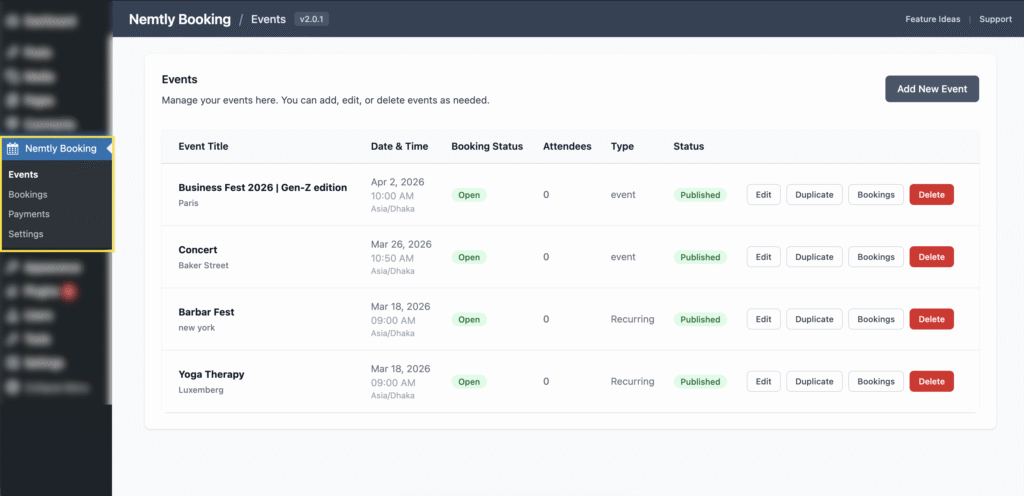
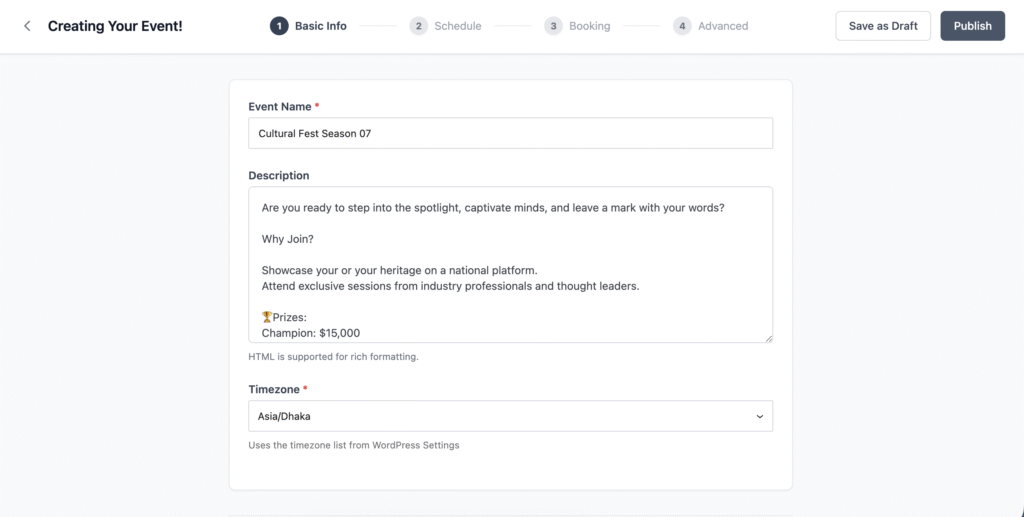
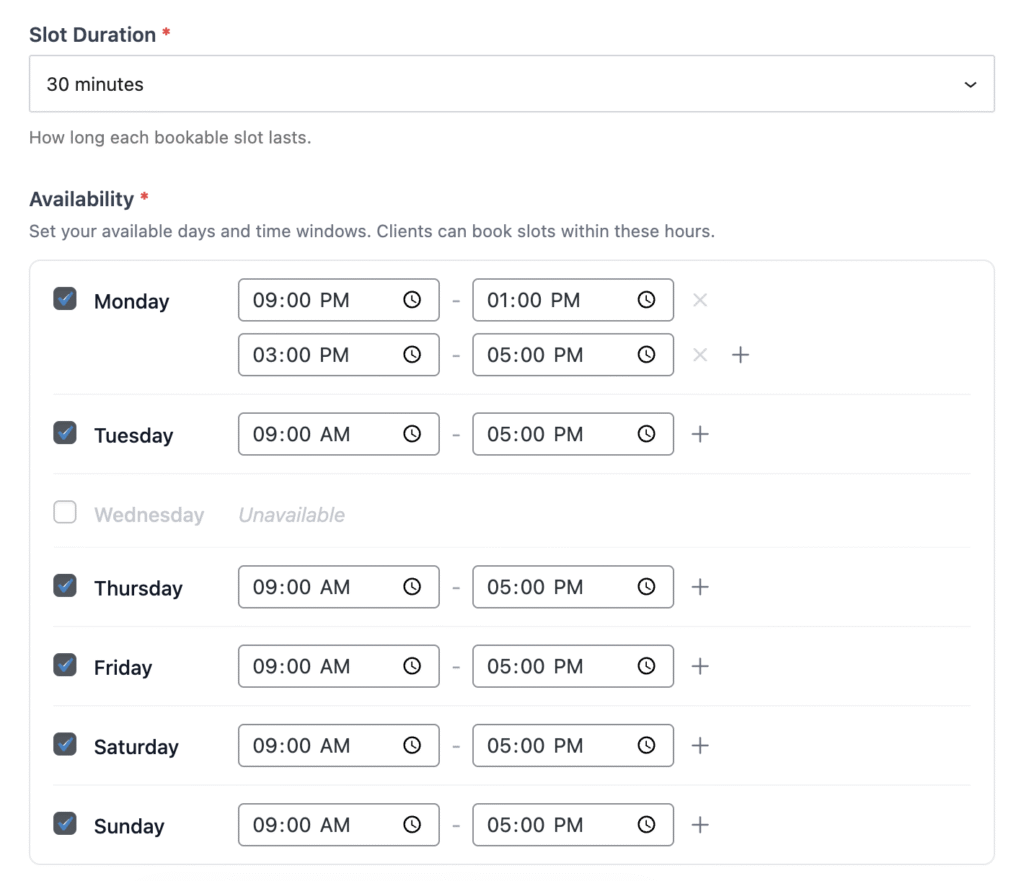
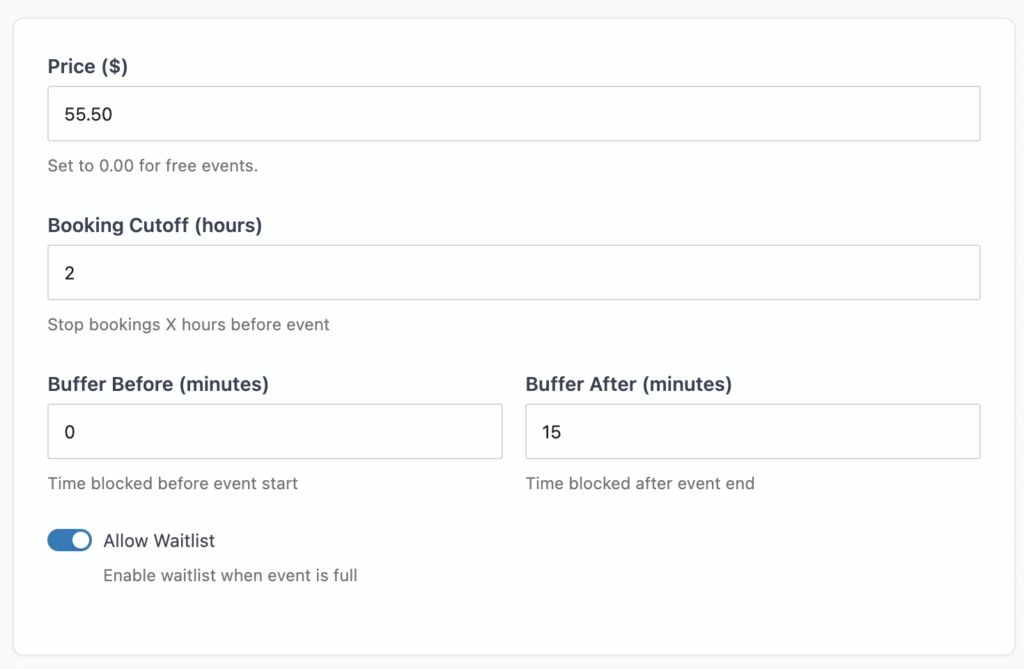
Go to Nemtly Booking → Events and click Add New Event. You’ll need at minimum:
- A title (e.g., “Team Strategy Workshop”)
- A date and time — set in the Schedule step of the event form
- Click Publish
Create 2–3 events across different dates so your calendar has something to display. You can always edit or add more later.
For a detailed walkthrough of event creation, see this guide: How to Create a Booking System on WordPress.
Step 3: Add the Calendar to a Page
You have two options depending on how you build pages.
Option A: Gutenberg Block (Block Editor)
- Open any page in the WordPress block editor (or create a new one, e.g., “Events Calendar”)
- Click the + inserter button and search for “Event Calendar”
- Insert the block
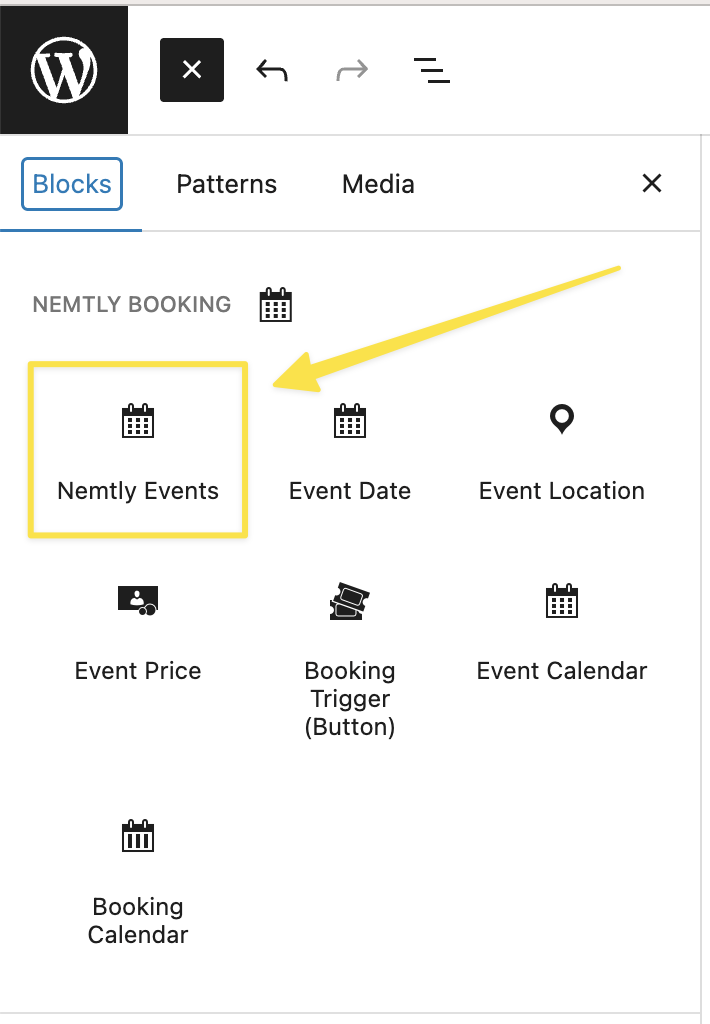
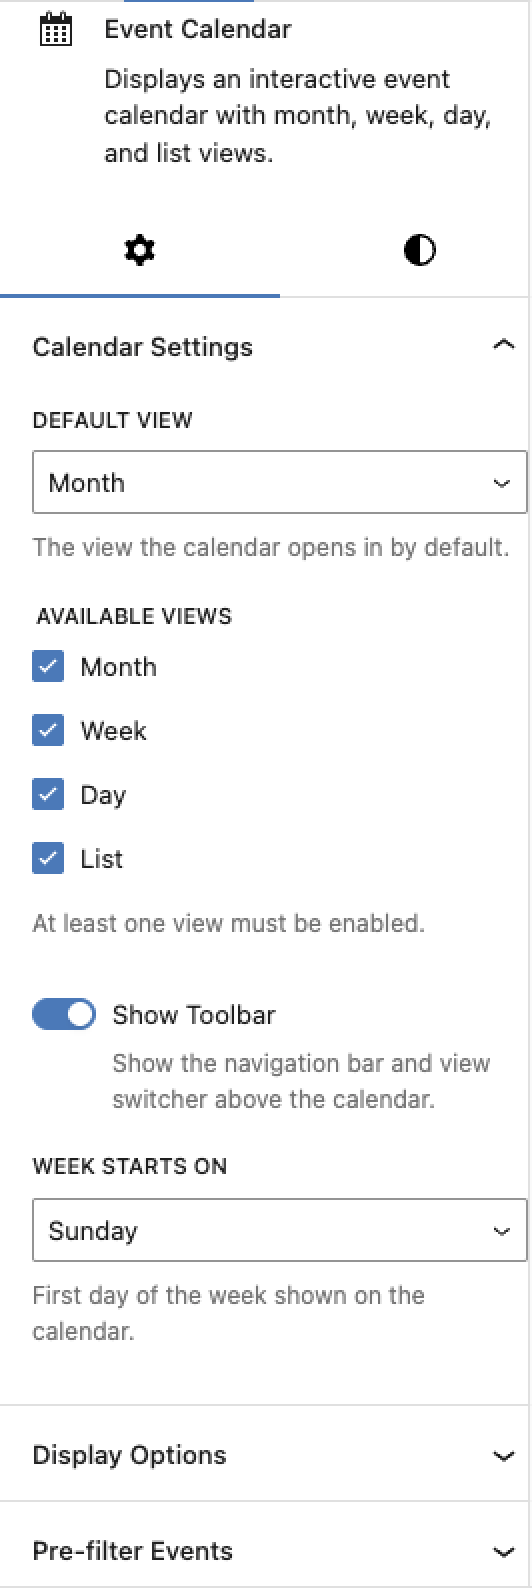
The calendar appears immediately in the editor with a live preview. You can configure it using the block sidebar panel:
- Default view — Which view loads first: month, week, day, or list
- Available views — Which views visitors can switch between using the toolbar
- Show toolbar — Toggle the navigation bar with month/week navigation arrows
- Show filters — Toggle filter dropdowns above the calendar
- First day of week — Sunday or Monday
- Events per cell — Maximum events shown per day before a “+N more” link appears (default: 3)
- Time format — 12-hour, 24-hour, or match your WordPress site setting
- Show event time — Display start times on event chips
- Show “Book Now” button — Whether event popups include a booking link
- Show past events — Include or hide events that have already happened
- Height — Auto (grows with content) or fixed pixel height
Publish the page and your calendar is live.
Option B: Shortcode (Classic Editor or Page Builders)
Paste this shortcode into any page, post, or widget area:
[nemtly_calendar]That’s it for the defaults. The calendar renders with month view, all four views available, toolbar and filters visible.
To customize, add attributes:
[nemtly_calendar view="week" show_filters="false" week_starts_on="monday"]Available shortcode attributes:
| Attribute | Options | Default |
|---|---|---|
view | month, week, day, list | month |
views | Comma-separated list of allowed views | month,week,day,list |
show_toolbar | true, false | true |
show_filters | true, false | true |
week_starts_on | sunday, monday | sunday |
events_per_cell | Any number | 3 |
time_format | 12h, 24h, site_default | site_default |
show_event_time | true, false | true |
show_booking_btn | true, false | true |
show_past_events | true, false | false |
height | auto, fixed | auto |
height_px | Any number (pixels) | 600 |
The shortcode works inside Elementor, Beaver Builder, Divi, and any other page builder that supports WordPress shortcodes.
Understanding the Calendar Views
Each view serves a different purpose. Choosing the right default depends on your use case.
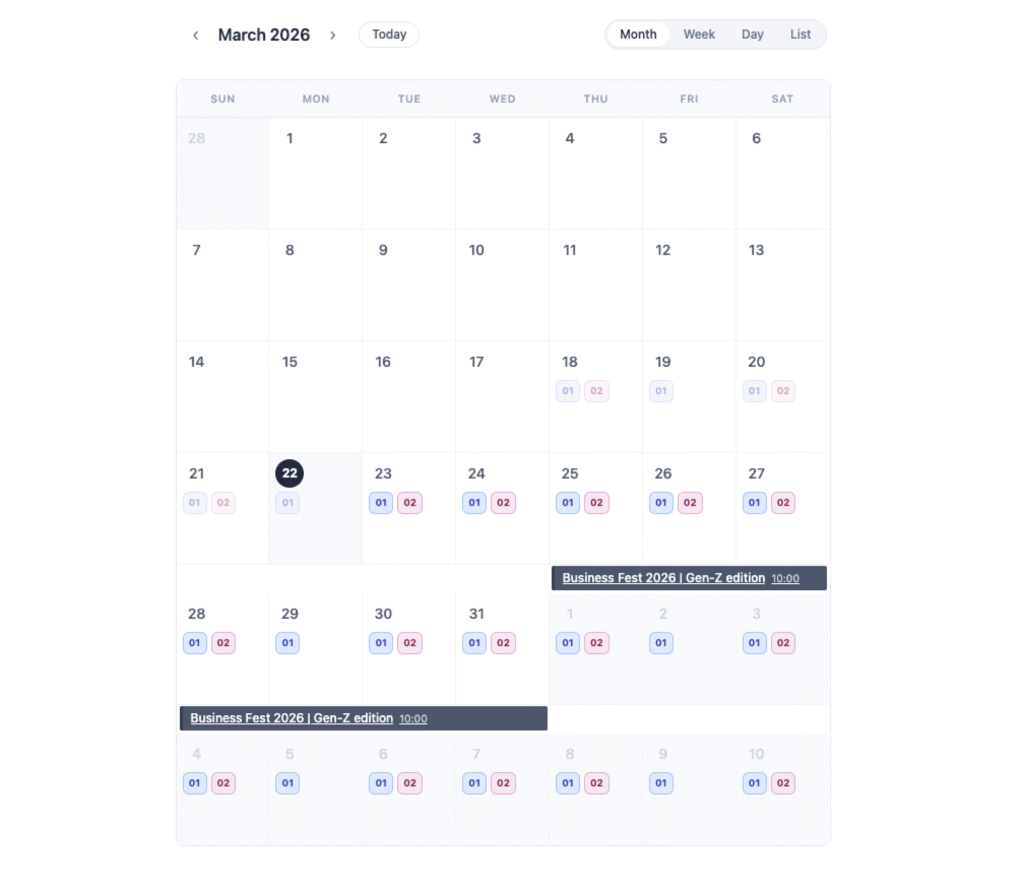
Month View
The classic calendar grid. Best for:
- Event organizers showing a full month of activities
- Businesses with events spread across many dates
- Visitors who want a big-picture overview
Events appear as chips on their date. Multi-day events span across cells. If a day has more events than the events_per_cell limit, a “+N more” link appears.
Week View
A 7-day view with time slots visible. Best for:
- Service providers showing a week of available appointments
- Fitness studios displaying a weekly class schedule
- Visitors who need to see exact times
Day View
A single day with hour-by-hour detail. Best for:
- Busy days with many events (conferences, all-day workshops)
- Showing a detailed schedule for a specific date
List View
A chronological list of upcoming events — no grid, just a clean list. Best for:
- Simple event listings without the visual calendar overhead
- Mobile-first sites where a grid may feel cramped
- Visitors who just want to scan what’s coming up
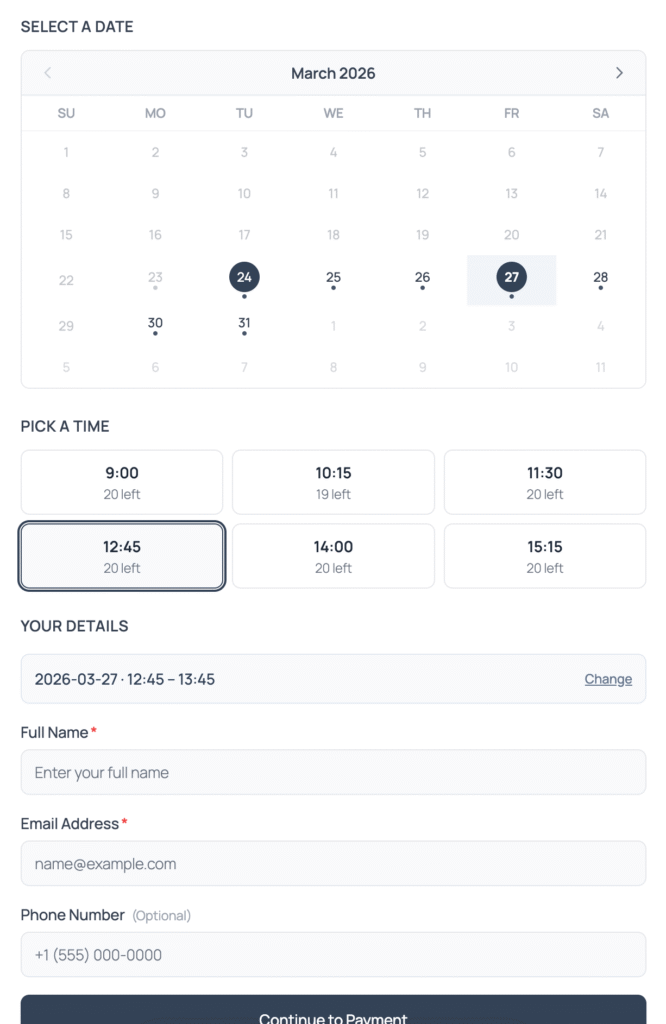
Clicking an Event
When a visitor clicks an event on the calendar, they’re taken to the event’s dedicated WordPress page. There they can see the full description, date and time details, location, pricing, and the booking form.
This means your calendar serves as both a visual overview and a navigation tool — visitors find what interests them, click through, and book.
Common Setups
Here are a few real-world examples of how to configure the calendar for different use cases.
Yoga Studio Weekly Schedule
Show a repeating weekly schedule where students pick a class time:
[nemtly_calendar view="week" show_past_events="false" week_starts_on="monday" time_format="12h"]Or use the block and set Default view to “week” and First day of week to “Monday” in the sidebar.
Conference or Meetup
Show a single month with event days highlighted:
[nemtly_calendar view="month" views="month,list" show_booking_btn="true"]Limiting available views to month and list keeps it simple — no one needs week/day view for a monthly conference calendar.
Consultant Availability
Show a day-by-day breakdown of open appointment slots:
[nemtly_calendar view="day" views="day,week" time_format="24h"]Day view as default lets clients immediately see today’s open times.
Simple Upcoming Events Page
Skip the calendar grid entirely and just show a list:
[nemtly_calendar view="list" views="list" show_toolbar="false"]This gives you a minimal, clean list of upcoming events with no calendar UI — just titles, dates, and times.
Calendar vs Event List: When to Use Which
Nemtly Booking also offers an event list via the [nemtly_event_list] shortcode or the Nemtly Events block. Here’s when to use each:
| Use Calendar When | Use Event List When |
|---|---|
| You want a visual date-based layout | You want a card/grid layout like a blog |
| Visitors need to find events by date | Visitors want to browse and search events |
| You have events spread across many dates | You have a smaller number of featured events |
| You want multiple view options (month/week/day) | You want filtering, search, and pagination |
You can use both on the same site — for example, a “Calendar” page with [nemtly_calendar] and an “Events” page with [nemtly_event_list].
Tips
- Keep the default view relevant to your audience. If most visitors want to see what’s happening this week, set
view="week". If they want the big picture, stick withview="month". - Limit views if your audience is non-technical. Four view options can be overwhelming. For a simple site,
views="month,list"gives enough flexibility without clutter. - Use fixed height for consistent page layouts. If the calendar sits alongside other content, set
height="fixed"andheight_px="600"to prevent the page from shifting as visitors switch views. - Hide past events to keep things clean. The default
show_past_events="false"is usually what you want. Enable it only if you need an archive view.
Summary
Adding an event calendar to WordPress takes about 5 minutes:
- Install and activate Nemtly Booking
- Create your events
- Drop the Event Calendar block or
[nemtly_calendar]shortcode onto any page - Configure the view and options to match your use case
The calendar updates automatically as you add, edit, or remove events. Visitors can browse by month, week, day, or list — and click through to book directly.
Get started: Install Nemtly Booking from WordPress.org — it’s free.