Author: Sapayth

  • User Avatar Block – Complete User Guide

    User Avatar Block – Complete User Guide

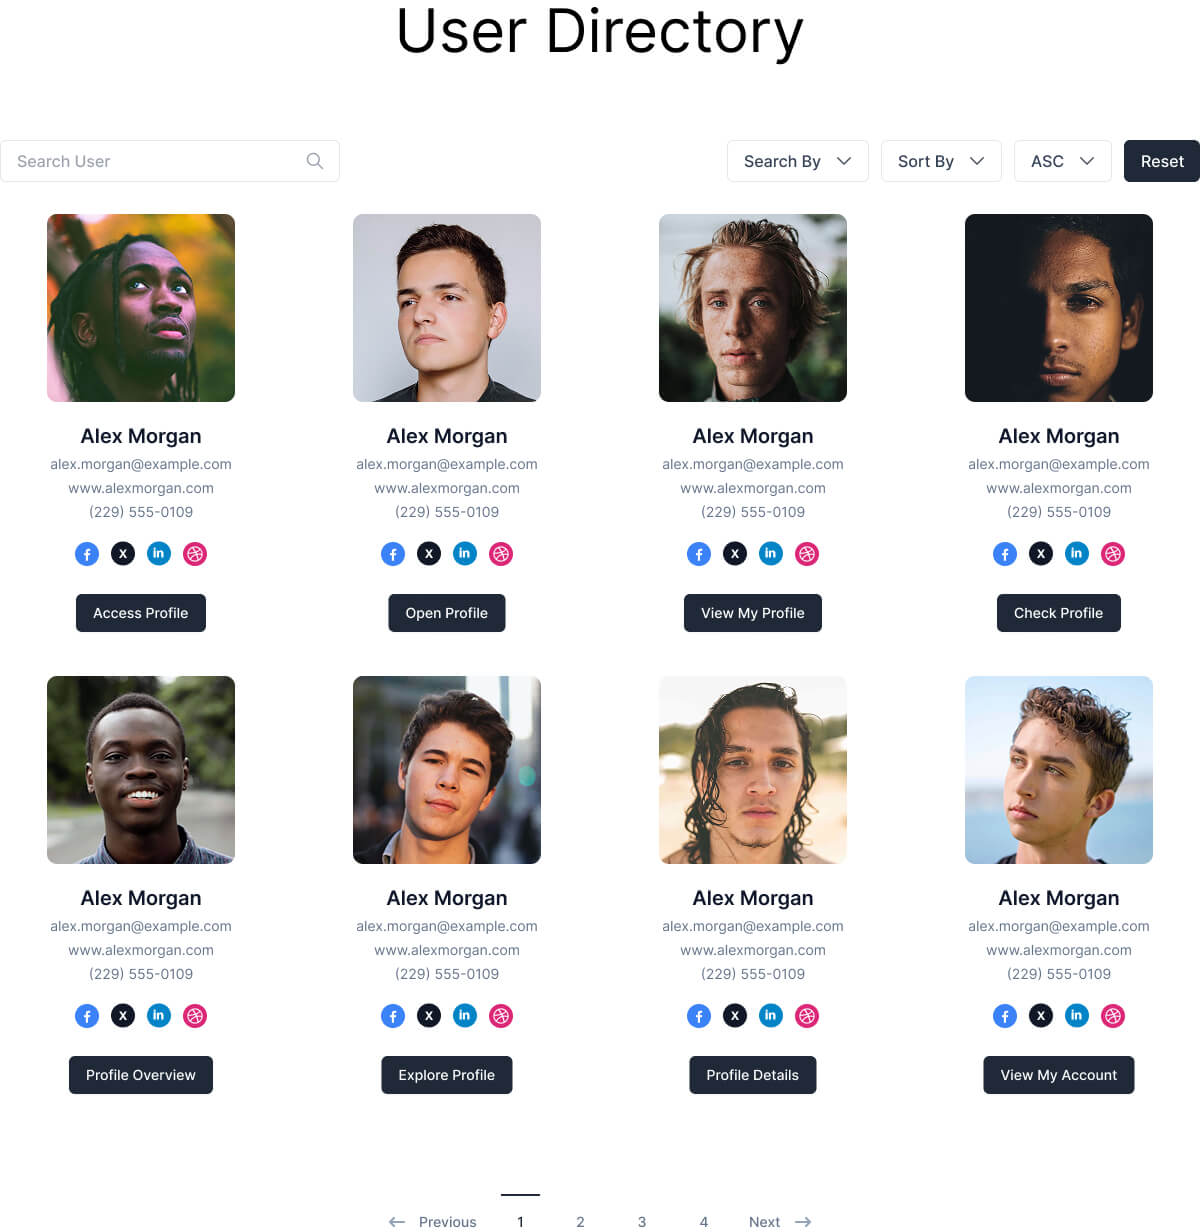
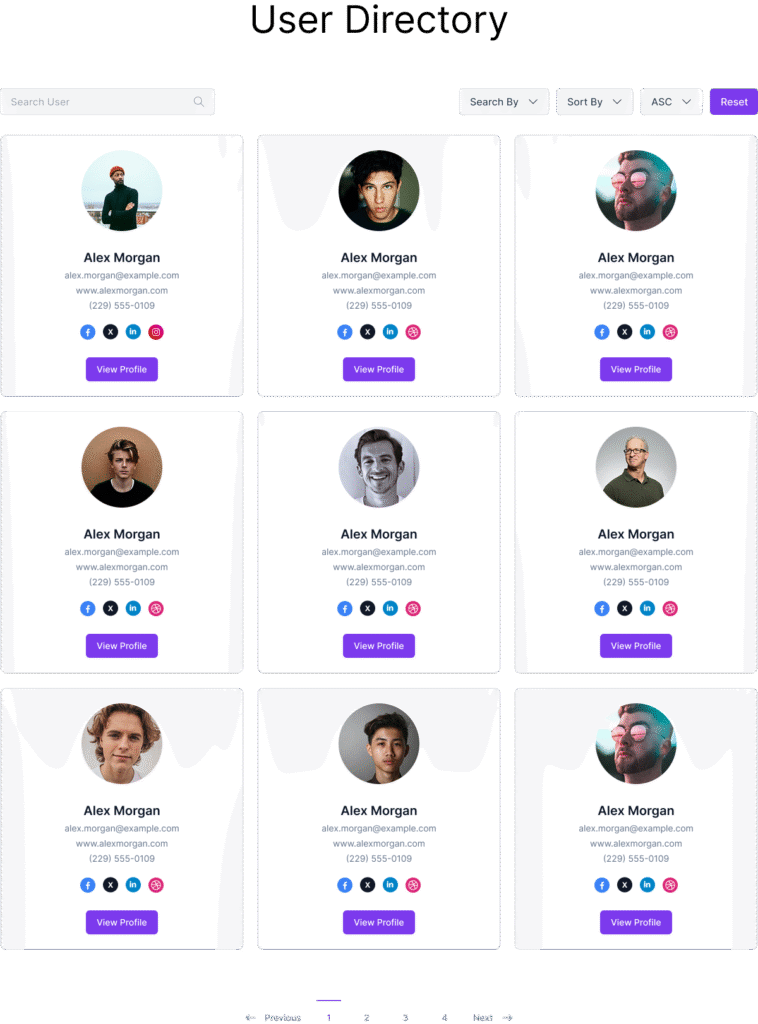
    Meet the User Avatar Block

    When you’re building a user directory, community site, or membership portal, a user’s photo can make all the difference. The User Avatar Block lets you display user profile pictures beautifully and consistently across your site, from compact lists to full-page profiles. Whether users upload their own images or rely on fallbacks, this block ensures every profile looks polished.

    Let’s explore how this block works, how to customize it, and how you can make the most of it in your designs.


    What is the User Avatar Block?

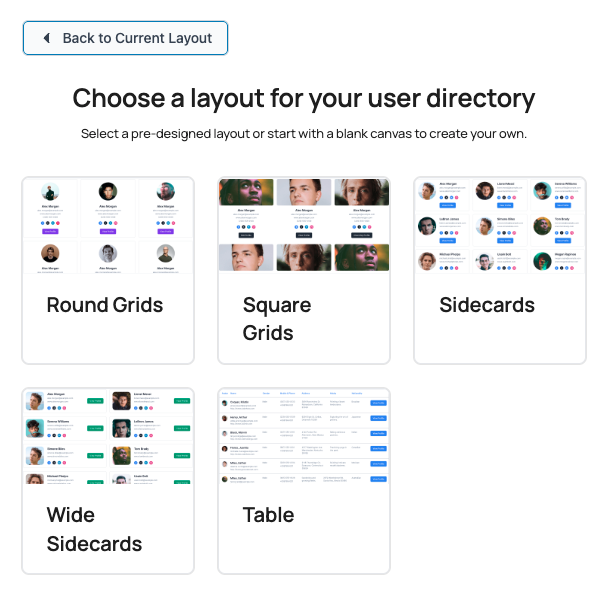
    The User Avatar Block is part of the WPUF User Directory system and is designed to display profile photos for your users. It acts like a dynamic “photo frame” that automatically pulls the right image for each user. Ideal for directories, team pages, or profile layouts.

    Key Features

    • Display each user profile pictures
    • Choose avatar size (Small, Medium, Large, Extra Large, or Custom)
    • Customize avatar shape (Circle, Square, Rounded)
    • Handle missing profile photos with fallback options
    • Use initials or Gravatar as fallbacks

    How to Use the User Avatar Block

    Step 1: Add the Block

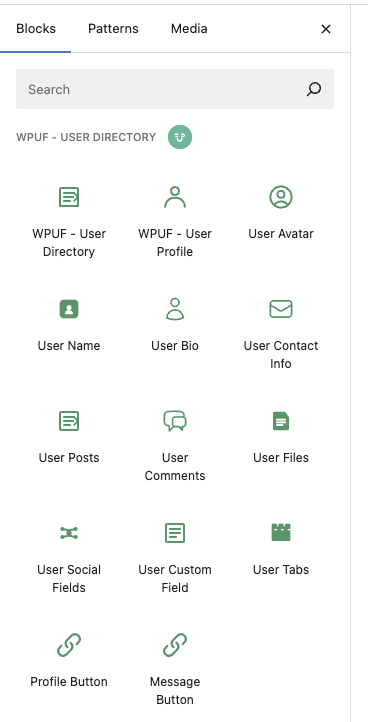
    1. Open any User Directory or User Profile block.
    2. Click the + icon to add a new block.
    3. Search for “User Avatar”.
    4. Select WPUF – User Avatar from the block list.

    Step 2: Configure the Settings

    Once added, click on the block to open the settings panel on the right. From there, you can control everything. Size, shape, and fallback behavior.


    Block Settings Explained

    Avatar Size

    Choose how large you want the profile photo to appear:

    • Small (32px) – Compact, great for lists
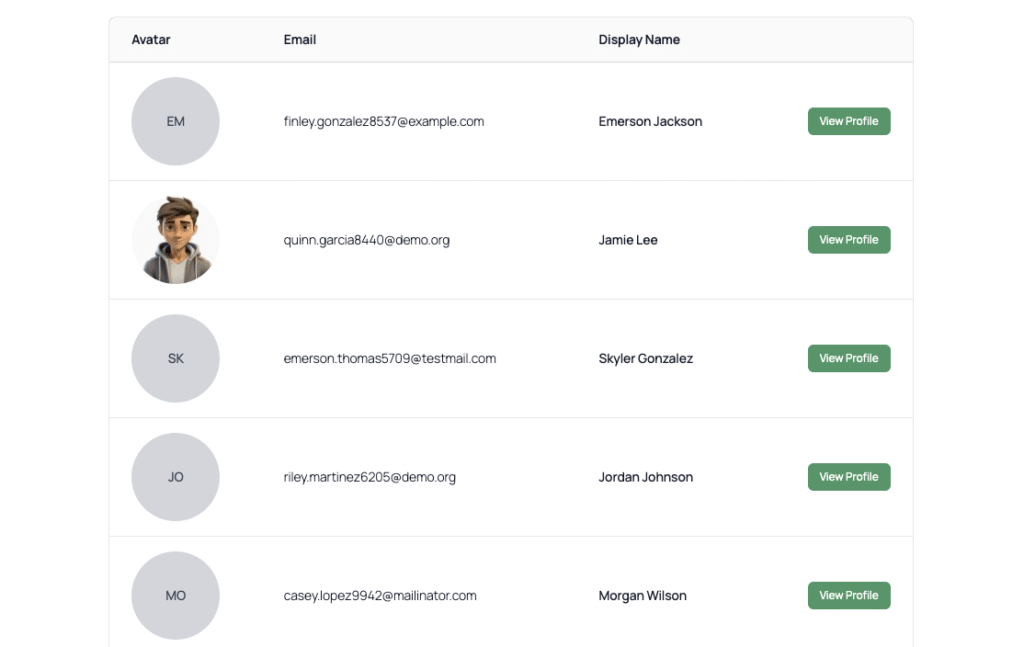
    • Medium (96px) – Perfect for directories
    • Large (150px) – Best for profile pages
    • Extra Large (300px) – Ideal for featured users
    • Custom – Set a specific pixel value (32px to 600px)
    • If you pick “Custom,” you can define the exact size (between 32px and 600px).
      Use this to match unique design layouts or branding requirements.

    Avatar Shape

    Decide how avatars are styled:

    • Circle – Modern and friendly
    • Square – Clean and professional
    • Rounded – Balanced, soft-cornered design

    Fallback Type

    Choose what appears when a user has no uploaded photo:

    • Initials – Displays user initials in a styled background (default)
    • Gravatar – Pulls from the Gravatar service if available
    • The block automatically prioritizes available profile photos.
    • If none exist:
    • It tries Gravatar (if selected).
    • Otherwise, it shows Initials by default.

    Unlock the User Directory module with WPUF Professional and start showcasing your users beautifully. Get it directly from weDevs site.


    Best Practices

    Size Recommendations

    • Lists: Small to Medium
    • Profiles: Medium to Large
    • Featured areas: Large to Extra Large

    Shape Recommendations

    • Circle – Modern, social feel
    • Square – Professional, clean look
    • Rounded – Versatile, balanced

    Fallback Recommendations

    • Initials – Best default (always available)
    • Gravatar – Great for communities with existing Gravatar users

    Troubleshooting

    No Avatar Showing?

    • Check fallback type (Initials or Gravatar).
    • Make sure user data is loaded.
    • Test with different users.

    Avatar Too Small or Large?

    • Verify the size option.
    • Keep custom sizes within 32px to 600px.
    • Check your theme’s layout constraints.

    Shape Looks Off?

    • Confirm the shape setting.
    • Try different shapes to isolate CSS conflicts.
    • Clear your cache after making changes.

    Fallback Not Working?

    • Make sure the fallback type is selected.
    • Ensure the user has a display name (for initials).
    • Test with multiple accounts.

    Styling and Customization

    Built-In WordPress Styles

    The block supports:

    • Margins and padding

    Custom CSS Example

    /* Enlarge avatars slightly on hover */
    .wpuf-user-avatar:hover img {
      transform: scale(1.1);
    }
    
    /* Add a subtle shadow */
    .wpuf-user-avatar img {
      box-shadow: 0 2px 4px rgba(0,0,0,0.1);
    }
    

    Combine With Other Blocks

    Pair the User Avatar Block with:

    • User Name Block – for profile cards
    • User Bio Block – for team pages
    • User Contact Info Block – for directories
    • Profile Button Block – for clickable cards

    These combinations help you create flexible, professional user layouts.


    FAQ

    What if a user doesn’t have a photo?

    The block automatically shows initials or pulls from Gravatar, depending on your fallback setting.

    Can I use custom image sizes?

    Yes! Choose “Custom” and set any pixel value between 32 and 600.

    Does it work with all WordPress themes?

    Yes. The block follows your theme’s styles, and you can override with CSS if needed.

    Can I use it outside the User Directory block?

    It’s primarily designed for the WPUF User Directory and Profile blocks. So it should not work outside the WPUF User Directory or User Profile block.

    How can I make avatars load faster?

    Use optimized images, caching plugins, and avoid unnecessarily large sizes.


    What’s Next?

    You’ve mastered the User Avatar Block, the visual cornerstone of user profiles.
    Next up in this series, we’ll explore the User Name Block, where you’ll learn how to display names dynamically and combine them with avatars for beautiful user cards.

    Stay tuned for the next guide!

  • User Directory Block – Complete User Guide

    User Directory Block – Complete User Guide

    If you want to create a WordPress user directory or a membership listing without custom code, the User Directory Block is your starting point. This block acts as the main container for displaying users on your site in different layouts (table, cards, or grids).

    Whether you’re building a team page, community directory, or author list, the User Directory Block gives you full control over search, sorting, roles, and layout, directly inside the Gutenberg editor.


    What is the User Directory Block?

    The User Directory Block is the backbone of the WPUF User Directory system. Think of it as a digital phone book that organizes your users into a professional, searchable, and customizable listing.

    What You Can Do With It

    • Display lists of users (team, staff, members, authors, etc.)
    • Enable search to quickly find specific users
    • Allow frontend sorting by name, email, registration date, and more
    • Control how many users appear per page (pagination included)
    • Show only certain user roles or exclude others
    • Choose from multiple layouts (table, card, or grid)
    • Add user details (avatar, name, bio, contact info) using inner blocks

    Getting Started

    1. Step 1: Add the Block
      Open your WordPress page or post in the block editor.
    2. Click the “+” button to add a new block.
    3. Search for “User Directory”.
    4. Select WPUF – User Directory to insert it.

    Step 2: Choose Your Layout

    When you add the block, you’ll see layout options:
    Round Grids, Square Grids, Sidecards, Wide Sidecards, Table

    Step 3: Add User Information Blocks

    Inside the User Directory Block, you can add supporting blocks like:

    • User Avatar – Profile pictures
    • User Name – Display names
    • User Bio – Biographies
    • User Contact Info – Emails, websites, phone numbers
    • User Social Fields – Social media links
    • User Custom Field – Any custom usermeta
    • User Posts / Comments / Files – User-generated content
    • Profile Button – Links to individual user profiles

    Block Settings

    Click the User Directory Block to configure its settings in the sidebar.

    🔹 Layout Settings

    • Choose Different Layout – Switch between table, card, and grid designs.
    • Users Per Row (Grid Layouts) – Control how many users appear per row (e.g., 1, 2, 3, or 4).

    🔹 Display Options

    User Roles

    • All Roles – Show all users (default).
    • Specific Roles – Display only Administrators, Editors, Authors, etc.
    • Multiple Roles – Select multiple roles for inclusion.

    Exclude Options

    • Exclude Roles – Hide users from specific roles.
    • Exclude Users – Hide specific individual accounts.
    • Max Profiles Per Page – Control pagination (1–50 per page).

    🔹 Search Options

    • Toggle ON to show a search bar.
    • Toggle OFF to hide search.

    Search Settings (when enabled)

    • Search Placeholder – Text inside the search box (default: “Search Users”).
    • Searchable Fields – Choose which fields are searched:
      • Username
      • Email
      • Display Name
      • First Name
      • Last Name
      • Custom fields (e.g., job title, department)

    🔹 Sorting Options

    Enable Frontend Sorting

    • Toggle ON to let visitors sort results.
    • Toggle OFF to use only the default sort order.

    Sort Settings

    • Available Sort Options – Select from:
      • User ID
      • Username
      • Email
      • Display Name
      • Registration Date
    • Default Sort Order – Ascending (A–Z) or Descending (Z–A).

    Layout Options in Detail

    Table Layout

    • Best for: Business directories, author lists, structured data.
    • Features: Displays users in a traditional table.
    • Special Settings:
      • Show Avatar – Toggle avatars in the table.
      • Avatar Size – Small, Medium, or Large.
      • Avatar Shape – Circle or Square.
      • Avatar Fallback Type – Show initials when no avatar is available.
      • Table Columns – Choose which columns to show (e.g., email, display name, role).

    Other Layouts: Round Grids, Square Grids, Sidecards, Wide Sidecards

    • Extra design options for different site styles.
    • Choose the one that fits your branding best.

    Search Functionality

    • Visitors can type into the search box.
    • The system checks the selected searchable fields.
    • Results update instantly with matching users.

    Search Tips:

    • Enable multiple fields for flexibility.
    • Include custom fields if your users have specific metadata.
    • Always test search with real user data.

    Sorting and Organization

    • Default Sorting → Set the default order (e.g., by display name ascending).
    • Frontend Sorting → Let users sort dynamically.
    • Pagination → Adjust how many users show per page.

    Unlock the User Directory module with WPUF Professional and start showcasing your users beautifully. Get it directly from weDevs site.


    Use Cases

    Member Directory

    Layout: Modern Cards
    Roles: All Roles
    Search: Enabled
    Sort: Display Name (Ascending)
    Blocks: Avatar, Name, Bio, Profile Button
    

    Team Page

    Layout: Professional Grid
    Roles: Administrators + Editors
    Search: Enabled
    Sort: Display Name (Ascending)
    Blocks: Avatar, Name, Custom Field (Job Title), Contact Info
    

    Author Directory

    Layout: Classic Table
    Roles: Authors + Editors
    Search: Enabled
    Sort: Registration Date (Descending)
    Table Columns: Email, Display Name
    Blocks: Avatar, Name, Posts, Profile Button
    

    Troubleshooting

    Directory is Empty

    • Wrong roles selected.
    • Excluded all users.
    • Check User Roles setting.

    Search Not Working

    • Search disabled.
    • No searchable fields selected.
    • Users lack data in those fields.

    Layout Looks Wrong

    • Too many blocks inside each user card.
    • Try switching layouts.
    • Test mobile responsiveness.

    Performance Issues

    • Too many users per page.
    • Too many searchable fields.
    • Use caching plugin for optimization.

    Tips & Best Practices

    • For Beginners → Start simple with avatars, names, and profile buttons.
    • For User Experience → Always enable search and keep pagination reasonable.
    • For Performance → Optimize avatars and limit search fields.
    • For Mobile → Use card or grid layouts (Layout 2 or 3).

    Success Checklist

    Before you publish your directory:

    • ✅ Added the User Directory Block
    • ✅ Chosen a layout (table, card, or grid)
    • ✅ Added supporting blocks (Avatar, Name, Bio, etc.)
    • ✅ Configured user roles, exclusions, and pagination
    • ✅ Enabled search and/or sorting if needed
    • ✅ Set table-specific settings (if using Layout 1)
    • ✅ Tested on mobile and desktop
    • ✅ Previewed the final result

    With the User Directory Block, you can turn WordPress into a flexible membership or team directory, styled exactly the way you want, directly in Gutenberg.

  • Introducing WPUF User Directory Blocks: Build Custom User Directories with Gutenberg

    Introducing WPUF User Directory Blocks: Build Custom User Directories with Gutenberg

    Creating a user directory or profile page in WordPress isn’t always simple. By default, WordPress gives you user registration and management, but it doesn’t provide a flexible way to showcase users on the front end. Whether you’re building a membership site, team page, student directory, or a community hub, you often need plugins or custom development to make it work.

    Recently, I’ve developed the Gutenberg Blocks for WPUF User Directory. A complete solution that lets site admins build beautiful, flexible, and customizable user directories right inside the block editor. These blocks allow you to display users in a listing format or show detailed individual profiles, with total control over layout, styling, and visibility.

    In this post, I’ll introduce the main blocks, explain how they work together, and share use cases where they shine. This is part 1 of a full series that will cover setup, customization, and detailed guides for each block.


    What Are WPUF User Directory Blocks?

    The WPUF User Directory Blocks are a set of Gutenberg blocks designed to give WordPress site owners a drag-and-drop way to display users, their information, and their content. Instead of relying on shortcodes or fixed templates, you can build dynamic user directories and profiles directly in the WordPress editor.

    There are two main container blocks and several supporting blocks that display user details, content, or interactions:

    Main Blocks

    • User Directory Block – Display a list of users (great for membership listings or team pages).
    • User Profile Block – Display a detailed view of a single user (perfect for profile pages or author pages).

    User Information Blocks

    • User Avatar Block – Show profile pictures.
    • User Name Block – Display the user’s display name.
    • User Bio Block – Highlight the user’s biography.
    • User Contact Info Block – Add email, phone, or other contact details.
    • User Custom Field Block – Display custom WP usermeta fields (job titles, departments, etc.).
    • User Social Fields Block – Add social media links (Facebook, Twitter, LinkedIn, etc.).

    Content Blocks

    • User Posts Block – Display posts authored by the user.
    • User Comments Block – Show recent comments.
    • User Files Block – Display files uploaded by the user.

    Why Use Gutenberg User Directory Blocks?

    The WPUF User Directory Blocks are built for flexibility:

    • Native Gutenberg Experience – Build directories visually with drag-and-drop blocks.
    • Fully Customizable – Control typography, colors, spacing, and layout within the editor.
    • Conditional Visibility – Show or hide blocks based on user role or viewer role.
    • Responsive & Mobile-Friendly – Works on any device without extra coding.
    • Extendable – Use with custom usermeta, integrations, or additional plugins.

    This means you can design exactly the directory or profile layout you need, without touching a line of code.


    Example Use Cases

    Here are a few real-world ways you might use the WPUF User Directory Blocks in WordPress:

    Team Directory

    Perfect for business sites showcasing staff.

    User Directory Block
    ├── User Avatar Block
    ├── User Name Block
    ├── User Custom Field Block (Job Title)
    └── Profile Button
    

    Membership or Student Directory

    Great for schools, communities, or clubs.

    User Profile Block
    ├── User Avatar Block
    ├── User Name Block
    ├── User Bio Block
    ├── User Contact Info Block
    ├── User Social Fields Block
    └── User Posts Block
    

    Author Pages for Blogs

    Turn your authors into featured contributors.

    User Profile Block
    ├── User Avatar Block
    ├── User Name Block
    ├── User Bio Block
    ├── User Posts Block
    ├── User Comments Block
    └── User Social Fields Block
    

    Each of these layouts can be styled, reordered, or expanded with just a few clicks in the block editor.

    Unlock the User Directory module with WPUF Professional and start showcasing your users beautifully. Get it directly from weDevs site.


    SEO Benefits for Your WordPress Site

    Adding user directories and profiles isn’t just good for usability, it can also boost your site’s SEO:

    • More indexable content (author pages, team bios, member listings).
    • Internal linking opportunities (profile buttons link to user pages).
    • Increased dwell time (visitors spend longer browsing user content).

    If you run a membership site, educational portal, or content-heavy blog, structured user directories can help both users and search engines navigate your site better.


    What’s Next in the Series

    This is just the beginning. Over the coming weeks, I’ll publish dedicated posts on each block, including:

    • Quick Start Guide: Building your first directory.
    • User Directory Block – settings, layouts, and customization.
    • User Profile Block – detailed profiles and advanced setups.
    • User Avatar, Bio, and Contact Info Blocks – displaying user details.
    • User Posts, Comments, and Files Blocks – showcasing user activity.
    • User Social Fields and Custom Field Blocks – extending profiles with social links and metadata.
    • Advanced Features – conditional display, responsive layouts, and integrations.

    Each post will include screenshots, block settings, and real-world examples to help you implement the features step by step.


    Wrapping Up

    With the new WPUF User Directory Blocks, you no longer need complex shortcodes or heavy third-party plugins to create user listings and profiles. Instead, you can design beautiful, functional directories right inside the Gutenberg editor, whether it’s for a team page, membership listing, or a full community directory.

  • Mastering wp_debug_backtrace_summary(): WordPress Debugging Made Easy (and Fun)

    Let’s face it—debugging in WordPress can sometimes feel like chasing a mosquito in a dark room. You know there’s a bug, but where?!

    Thankfully, WordPress provides us with some handy tools to make our lives a whole lot easier. One of those unsung heroes is the wp_debug_backtrace_summary() function.

    What Is wp_debug_backtrace_summary() and Why Should You Care?

    In simple terms, wp_debug_backtrace_summary() gives you a neat little breadcrumb trail of function calls that led to the current point in your code. It’s like GPS for your brain when you’re trying to figure out “Wait… how did we even get here?”

    Think of it as a summarized version of debug_backtrace(), but trimmed down, cleaner, and just easier to read. It tells you what function was called, from where, and in what order.

    Common Use Cases

    • – Tracking down who called a particular function (plugin? theme? some mysterious ghost?)
    • – Debugging unexpected behavior in hooks, filters, or template overrides
    • – Custom logging or building a dev toolkit
    • – Adding context to error logs

    A Real Example (Because We Love Code)

    Let’s say you’re debugging a custom plugin and you want to know what triggered your function:

    function my_custom_function() {
        error_log( wp_debug_backtrace_summary() );
    }
    

    This will output something like:

    My_Plugin::some_method(), WP_Hook::apply_filters(), do_action('init')

    Translation? Your function was called by some_method() inside My_Plugin, which was triggered by a WordPress hook during the init action. Detective mode: Activated.

    Function Breakdown: Going Under the Hood

    Here’s the function signature:

    wp_debug_backtrace_summary( $ignore_class = null, $skip_frames = 0, $pretty = true )

    Let’s unpack those parameters like it’s a birthday gift:

    • $ignore_class — Want to ignore your own class to keep the output clean? You can.
    • $skip_frames — Skip N number of stack frames. Handy if you’re wrapping the function in helpers.
    • $pretty — If true, you get a nice readable format. False gives you raw class/function names (great for nerdier logging).

    🧠 Bonus Tip: When Not to Use It

    This function is for development and debugging. Don’t leave it in production unless you’re logging for a very specific reason and you know what you’re doing. Otherwise, it’s like leaving a walkie-talkie on during a top-secret mission.

    The Difference Between wp_debug_backtrace_summary() vs debug_backtrace()

    debug_backtrace() is like the full Sherlock Holmes novel: detailed, deep, but maybe a bit much when all you want is the killer’s name.
    wp_debug_backtrace_summary() is the: just the juicy parts you care about.

    Also, the WordPress function makes sure the output is clean, consistent, and WordPress-friendly.

    Wrapping Up

    If you’re debugging WordPress and still not using wp_debug_backtrace_summary(), you’re missing out on one of the easiest ways to track down issues. It’s fast, informative, and helps you stay sane when your hooks, plugins, and themes start playing the blame game.

    Next time something weird happens in your WordPress site (and let’s be honest, it will), drop in a wp_debug_backtrace_summary() and follow the breadcrumbs.

    Happy debugging, and may your logs be ever helpful!

  • WordPress Hooks Order: Your Backstage Pass to the Dashboard and Frontend

    Hey there, fellow WordPress wrangler!
    Ever wish you could sneak into the backstage of WordPress and whisper, “Hey, do this when that happens”? Well, you can — thanks to WordPress hooks.

    Whether you’re building a personal site, crafting a client project, or just tinkering to learn — mastering hooks gives you superpowers.

    In this post, we’re diving into:

    ✅ What the heck a WordPress hook actually is
    ✅ Two shiny tables: admin dashboard vs frontend hooks
    ✅ Key info: hook name, what it does, how many parameters it passes, and little pro tips
    ✅ Some cheeky commentary (because code is fun)

    Let’s hook in!


    So… What Is a WordPress Hook?

    A WordPress hook is a way to tap into the core without hacking it.

    Hooks come in two flavors:

    • Action Hooks: Do something when WordPress gets to a certain point.
    • Filter Hooks: Change something before it’s output or saved.

    Think of them like event listeners or interceptors — but friendlier.

    Now, WordPress is hooked up with hundreds of these. But instead of listing them all like a phonebook, I’ve split the most useful ones for personal developers into two tidy camps:

    • 🛠️ Admin Dashboard Hooks (for the admin wizards)
    • 🏡 Frontend Hooks (for what users actually see)

    Grab your coffee ☕, it’s table time.

    Frontend Hook Execution Order

    OrderHook NameTypeDescriptionParameters
    1mu_plugin_loadedActionFires once all must-use plugins are loaded.None
    2network_plugin_loadedActionFires once all network plugins are loaded.None
    3muplugins_loadedActionAll must-use plugins are connected.None
    4registered_taxonomyActionFires after a taxonomy is registered.None
    5registered_post_typeActionFires after a post type is registered.None
    6plugin_loadedActionFires once a plugin is loaded.None
    7plugins_loadedActionAll plugins are plugged in.None
    8sanitize_comment_cookiesActionSanitize comment cookies.None
    9setup_themeActionBefore loading the theme’s functions.php file.None
    10load_textdomainActionLoad the theme’s textdomain.None
    11after_setup_themeActionAfter the theme’s functions.php file is loaded.None
    12auth_cookie_malformedActionFires when an authentication cookie is malformed.None
    13auth_cookie_validActionFires when an authentication cookie is valid.None
    14set_current_userActionSet the current user.None
    15initActionInitialize WordPress.None
    16widgets_initActionInitialize widgets.None
    17register_sidebarActionRegister sidebars.None
    18wp_register_sidebar_widgetActionRegister sidebar widgets.None
    19wp_default_scriptsActionRegister default scripts.None
    20wp_default_stylesActionRegister default styles.None
    21admin_bar_initActionInitialize the admin bar.None
    22add_admin_bar_menusActionAdd menus to the admin bar.None
    23wp_loadedActionWordPress is fully loaded.None
    24parse_requestActionParse the request.None
    25send_headersActionSend HTTP headers.None
    26parse_queryActionParse the query.None
    27pre_get_postsFilterModify the main query before it’s executed.$query
    28posts_clausesFilterModify the SQL clauses of the query.$clauses, $query
    29posts_selectionActionAfter the posts are selected.None
    30wpActionWordPress environment is set up.None
    31template_redirectActionBefore the template is loaded.None
    32get_headerActionBefore the header template is loaded.None
    33wp_headActionInside the <head> section of the theme.None
    34wp_enqueue_scriptsActionEnqueue scripts and styles for the front end.None
    35wp_print_stylesActionPrint styles in the header.None
    36wp_print_scriptsActionPrint scripts in the header.None
    37get_search_formFilterFilter the search form HTML.$form
    38loop_startActionBefore the loop starts.$query
    39the_postActionAfter each post is set up.None
    40get_template_part_contentActionBefore a template part is loaded.None
    41loop_endActionAfter the loop ends.$query
    42get_sidebarActionBefore the sidebar template is loaded.None
    43dynamic_sidebarFilterFilter the sidebar’s widgets output.$sidebar_output, $index
    44pre_get_commentsFilterModify the comments query before it’s executed.$query
    45wp_metaActionAdd meta tags to the header.None
    46get_footerActionBefore the footer template is loaded.None
    47wp_footerActionInside the footer section of the theme.None
    48wp_print_footer_scriptsActionPrint scripts in the footer.None
    49admin_bar_menuActionModify the admin bar menu.$wp_admin_bar
    50wp_before_admin_bar_renderActionBefore the admin bar is rendered.None
    51wp_after_admin_bar_renderActionAfter the admin bar is rendered.None
    52shutdownActionAfter WordPress has finished processing.None

    Admin Panel & AJAX Hook Execution Order

    OrderHook NameTypeDescriptionParameters
    1mu_plugin_loadedActionFires once all must-use plugins are loaded.None
    2network_plugin_loadedActionFires once all network plugins are loaded.None
    3muplugins_loadedActionAll must-use plugins are connected.None
    4registered_taxonomyActionFires after a taxonomy is registered.None
    5registered_post_typeActionFires after a post type is registered.None
    6plugin_loadedActionFires once a plugin is loaded.None
    7plugins_loadedActionAll plugins are plugged in.None
    8sanitize_comment_cookiesActionSanitize comment cookies.None
    9setup_themeActionBefore loading the theme’s functions.php file.None
    10load_textdomainActionLoad the theme’s textdomain.None
    11after_setup_themeActionAfter the theme’s functions.php file is loaded.None
    12auth_cookie_validActionFires when an authentication cookie is valid.None
    13set_current_userActionSet the current user.None
    14initActionInitialize WordPress.None
    15widgets_initActionInitialize widgets.None
    16register_sidebarActionRegister sidebars.None
    17wp_register_sidebar_widgetActionRegister sidebar widgets.None
    18wp_default_scriptsActionRegister default scripts.None
    19wp_default_stylesActionRegister default styles.None
    20admin_bar_initActionInitialize the admin bar.None
    21add_admin_bar_menusActionAdd menus to the admin bar.None
    22wp_loadedActionWordPress is fully loaded.None
    23auth_redirectActionRedirects unauthenticated users to the login page.None
    24_admin_menuActionInternal hook for setting up the admin menu.None
    25admin_menuActionAllows adding items to the admin menu.None
    26admin_initActionInitialize the admin panel.None

    Quick Peek: Hook in Action

    Let’s say you want to add a custom stylesheet only for the admin:

    add_action('admin_enqueue_scripts', function() {
        wp_enqueue_style('my-admin-style', get_template_directory_uri() . '/admin.css');
    });

    Or maybe, you’re sneaking a cheeky “Read More” after every post:

    add_filter('the_content', function($content) {
        if (is_single()) {
            $content .= '<p>Thanks for reading! More coming soon.</p>';
        }
        return $content;
    });

    Wrapping It Up (With a Cherry on Top)

    WordPress hooks might feel a bit invisible at first, but once you get them, you’ll start seeing the Matrix of WordPress.
    They’re your way of bending WordPress to your will — without touching core files, breaking updates, or sacrificing kittens.

    If you’re building your personal developer site, this is where your personality and code style shine. Want a slick dashboard experience for you and your clients? Use admin hooks. Want buttery frontend interactivity? Frontend hooks to the rescue!


    What’s Next?

    -> Try adding a few of these to your functions.php
    -> Pick one unfamiliar hook and build something fun
    -> Bookmark this post — trust me, future-you will thank you


    Have a favorite hook not listed here? Or a custom use-case you’re proud of? Drop it in the comments. Let’s keep this hook party going!

  • A Hypothetical Case Study: TechFlow’s Race Against Time – The Holiday Release Dilemma

    Background

    TechFlow had already navigated the challenges of revamping a major module, but now they faced a new dilemma—what if they scheduled their big release just before a major holiday?

    After months of development, leadership saw an opportunity to capitalize on the holiday season. With user engagement expected to be at its peak, a pre-holiday launch seemed like the perfect way to maximize impact, boost adoption, and enter the new quarter with strong momentum.

    The Plan

    The TechFlow team worked tirelessly, streamlining development, testing, and user feedback. The timeline was aggressive, but leadership was optimistic. Their plan looked like this:

    1. Final Development Sprint – Address major bugs and refine UI/UX.
    2. Beta Testing & Feedback Round – Select a small user group for real-world validation.
    3. Marketing & Awareness – Generate excitement through emails, blog posts, and social media.
    4. Pre-Holiday Release – Deploy the new version a few days before the holiday, ensuring users experience the improvements firsthand.

    The Pros of a Pre-Holiday Release

    • Increased Engagement: With more users online during the holiday season, adoption rates could surge.
    • Marketing Advantage: A fresh release can generate buzz and give TechFlow an edge over competitors.
    • Revenue Opportunities: If the platform included premium features, this period could drive upgrades and new purchases.
    • Year-End Momentum: A successful launch could set the stage for a strong start in the following quarter.

    The Challenges & Risks

    • Limited Developer Availability: Many team members were planning time off, making rapid responses to critical issues difficult.
    • Higher Stakes for Bugs: A major issue post-launch could frustrate users and damage brand reputation.
    • Support Team Overload: A spike in user activity often means more support tickets, potentially overwhelming the reduced holiday staff.
    • Rollback Risks: If a rollback was necessary, it could disrupt users during a peak usage period.

    The Reality Check

    As the release date approached, tensions ran high. Internal testing revealed last-minute performance issues, and the support team raised concerns about their ability to handle holiday traffic. A heated discussion followed—should they push through or delay?

    After weighing the risks, TechFlow’s leadership made a strategic decision: a limited rollout to a smaller audience first. This approach allowed them to gather real-time feedback without exposing all users to potential disruptions. The wider release was scheduled for post-holiday, when the team was fully available.

    The Outcome

    The phased release strategy proved to be a win. The limited launch uncovered minor issues, which were quickly addressed before the full rollout. Users responded positively, and TechFlow entered the new quarter with both confidence and valuable insights.

    Key Takeaways

    • Holiday releases can be high-reward but come with significant risks.
    • Team availability should always be factored into release planning.
    • A phased rollout can mitigate risks and allow for quick fixes.
    • User excitement must be balanced with stability—launching a polished product is more valuable than rushing an incomplete one.

    This experience reinforced an important lesson: timing is crucial, but readiness is even more important.

  • Simplify WordPress Installation with WP Quick Installer

    As a WordPress developer, I often saw our QA team struggling with setting up fresh WordPress sites. The repetitive process was frustrating, so I built this script a long time ago. Recently, I polished it with AI to make it even better. Now, WP Quick Installer automates everything, saving time and effort.

    Why Use WP Quick Installer?

    WP Quick Installer is designed to simplify the process of setting up a local WordPress environment. Instead of manually downloading WordPress, configuring the database, and setting up admin credentials, this script does it all for you automatically.

    Key Features

    One-Command Installation – Set up WordPress quickly with a single command.
    Custom Admin Credentials – Easily define your admin username, password, and email.
    Automatic Database Setup – No need to create a database manually; the script handles it for you.
    SEO-Friendly Permalink Structure – Sets up pretty URLs (/%postname%/) by default.
    Cleanup & Optimization – Removes unnecessary default plugins (Akismet and Hello Dolly).
    Easy Uninstall – Remove a WordPress project and its database with a simple command.

    How to Use WP Quick Installer

    Installation

    To install WordPress using WP Quick Installer, run:

    ./install.sh [options] [project_name]

    Options

    OptionDescription
    -u USERNAMESet admin username (default: admin)
    -p PASSWORDSet admin password (default: admin)
    -e EMAILSet admin email (default: admin@mail.com)
    -hShow help message

    Example:

    ./install.sh -u myadmin -p securepassword -e myemail@example.com myproject

    Removing a WordPress Project

    If you need to uninstall WordPress and delete its database, run:

    ./install.sh remove [project_name]

    Who Can Benefit from This Script?

    WP Quick Installer is perfect for:

    • Web Developers – Speed up project setup and automate repetitive tasks.
    • Freelancers – Quickly set up local environments for client projects.
    • WordPress Beginners – Get started with WordPress in seconds without technical complexities.

    Get Started Today!

    Why waste time with manual installations when you can automate the process? Download WP Quick Installer now from GitHub and supercharge your WordPress workflow.

    🚀 Simplify your WordPress setup today!

  • A Hypothetical Case Study on Feature Revamp: Why Proper Planning Matters

    In software development, improving an existing feature while maintaining backward compatibility is like trying to renovate a house while people are still living in it—challenging, messy, and full of surprises. Imagine a software firm, TechFlow, that set out to revamp a key feature of their product, focusing on enhancing the user interface (UI) and user experience (UX). To keep things smooth for existing users, they planned to break the revamp into multiple releases. But midway through, they hit a snag: the old and new UX clashed like oil and water. Suddenly, their well-laid plans unraveled, forcing them to rethink everything.

    This hypothetical case study explores what went wrong and how teams can plan better to avoid such pitfalls.

    The Initial Plan: Incremental Rollout

    TechFlow’s development team thought they had it all figured out. The strategy? Improve the UI and UX of a core feature while ensuring backward compatibility. To avoid shocking users with a drastic change, they opted for a phased approach:

    • Release sections of the improved UI in stages.
    • Gather feedback from users along the way.
    • Ensure existing users could keep using the feature without disruption.
    • Manage development efforts while keeping up with other projects.

    On paper, it looked like a foolproof plan—steady progress, minimal risk, and happy users. But reality had other ideas.

    The Challenge: Fragmented UX and Technical Debt

    After completing and internally testing about a third of the revamped feature, the team noticed a glaring problem: the new and old UI/UX felt like two different worlds forced into one. The inconsistencies created a Frankenstein-like experience, full of awkward transitions and mismatched styles. The biggest issues?

    • Visual and functional inconsistencies – Some parts looked sleek and modern, while others were stuck in the past, making the overall design feel disjointed.
    • Workflow disruptions – Users navigating between old and new sections found the experience clunky and confusing.
    • Increased development complexity – Keeping two UI versions alive at the same time led to a tangled web of code, making future updates more difficult.

    At this point, TechFlow’s team realized they had two choices: keep pushing forward with the incremental rollout (and risk a subpar user experience) or hit the brakes and change course.

    The Pivot: Completing the Full Revamp

    After much debate (and maybe a few stress-induced coffee binges), the team decided to abandon their phased rollout and go all-in on completing the full revamp before release. This meant:

    • Allocating extra time to ensure the entire feature had a consistent UI/UX.
    • Reworking internal timelines to fit the new development plan.
    • Thorough testing to prevent regressions and ensure everything functioned smoothly.

    While this adjustment delayed the release, it ultimately resulted in a better user experience. However, the partial revamp left the codebase looking like a battlefield—some parts had already been rewritten while others remained unchanged. Without enough time to start from scratch, the team had to find creative ways to clean up and refactor the mixed codebase without slowing down future development.

    Lessons Learned: Plan Smarter, Not Harder

    This experience left the team with some hard-earned wisdom:

    1. Think through the UX impact before committing to incremental updates – A revamp is about the user experience. If partial updates create a disjointed UI, a full release may be the better route.
    2. Ensure design consistency across the entire feature – Before breaking a revamp into parts, check if each phase can stand alone without making the product feel like a patchwork quilt.
    3. Estimate the full scope realistically – If incremental updates aren’t feasible, it’s better to commit to a full overhaul upfront rather than switching strategies halfway.
    4. Prioritize maintainability over short-term convenience – Quick fixes and phased rollouts may seem efficient at first, but if they create technical debt, they’ll cause more problems down the line.

    Conclusion

    TechFlow’s case teaches us an important lesson: sometimes, a phased rollout isn’t the right call—especially for UI/UX overhauls. Proper planning, realistic scoping, and considering the big picture from the start can save teams from headaches, messy codebases, and missed deadlines.

    What about you? Have you ever faced a revamp that didn’t go as planned? Let’s swap war stories in the comments!